All posts by admin

Repairing Leaning Fence Posts

One side of my fence has been deteriorating for years and leaning towards my side of the property.  When I was out of the country, my friend came over and propped them up with some 2×4’s to keep it from falling.  The posts appear to be set in dirt and not concrete so the proper repair is to replace them which would require rebuilding the entire fence.  You can actually pour the cement mix dry and water it after which makes it a bit easier.

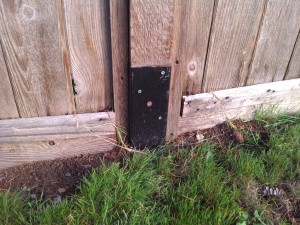
I came across the Simpson Fence Mender at Home Depot in the joist hangers section.  I bought one to try it out since they were relatively inexpensive.  The instruction indicate it should be installed in pairs but I figure a single one should improve the post.

The instructions indicated you should hammer on the indentation to drive it down but it is kind of hard to hit it with a mallet.  I just used a scrap piece of wood and pounded it from the top keeping it as close to the post as possible.

It actually worked pretty good and it was secure enough to remove the bracing and I bought a second one for the neigbouring post.


IMG_20151027_155209 (Medium)

Forcing Windows 10 Update on a New Laptop

My friend finally bought a new laptop but it had Windows 8 on it.  When first powered up, it had 160 important updates for Windows 8 but no option to directly update to Windows 10 though it asked during the initial setup.   I assumed I would get the update notification icon after installing all the updates.  It took hours to install these updates and still there was no Windows 10 update icon.   After some searching the correct procedure is detailed below.

To force an update of your new laptop, go to Microsoft’s update page here  You can download the Media Creation Tool.  This tool will update your current OS or allow you to make a bootable USB drive so you can perform a clean install.

To find your system type, either 32 or 64 bit version,  type System in the search tool.  This can also be found under Control Panel->System & Security->System.  Third option is right-clicking on Computer under the Start menu or desktop icon and selecting Properties.

I did use this tool to create a bootable USB before but forgot it could be used to force an update.

HP G56-118 Laptop – No Video, No boot, Blinking Caps Lock Key

My friend’s HP laptop wouldn’t boot and had a steady blinking caps lock key.  A band-aid solution was found online which involves wrapping the laptop in a blanket to force it to overheat (approx 15 min), popping out the battery to shut it off and then powering up again.  As crazy as this sounds, this technique actually works and he’s been using this technique for a couple of months, moving all his files to cloud storage.  Sleeping the laptop instead of powering off makes the problem occur less often.

This technique has been used on Xbox’s and the root cause seems to be failing solder joints on BGA (ball grid array) contacts for the video chip.  A proper fix would require the chip to be re-balled (expensive repair) and home fixes include baking the board in the oven or reheating the chip with a heat gun or butane torch.  Home fixes only seem to last a couple of months.

He will probably end up buying a new laptop and give his old one away.

Update: I was able to repair the laptop by baking the motherboard. See post here.

Hot Water Tank Replacement

Hot water tanks eventually rust out and will start leaking after many years.  My first replacement leaked right after the warranty expired and for my second replacement, I purchased one with the longest warranty available (12 years).  I was out of town when it was replaced, and my friend got several quotes and found Home Depot was the lowest for the tank and installation.  Since I don’t have a drain in the basement, I should have gotten a drain pan installed underneath the tank as well.

To be alerted next time the tank fails, I installed a flood sensor but ran it from an AC adapter instead of batteries.  I worried about batteries dying being left in the alarm for years.  There are single use detectors available as well.  When I installed my monitored alarm, I also added a second flood detector which required a separate 470pb probe.

You can replace the anode in a hot water tank to extends its life.  I think once my second tank goes, I will switch to a tankless heater.

Laminate Floor Installation

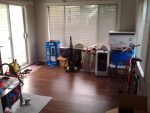
Browsing Home Depot, I found some 12mm laminate flooring for $1/sq ft.  This was a good deal since thick flooring is better and usually more expensive.  Though my upstairs needs new flooring, I didn’t want a patchwork of different flooring styles but will probably stick with carpet in the living areas and use plank vinyl in the bathroom and kitchen.  The upstairs addition is carpeted and gets dirty from the sliding door entry and I’ve also used the room as a work space.  I bought enough laminate to cover the addition, the foyer and stairs.

In the addition, I considered leaving the baseboards up but the correct thing to do was to remove and reinstall them.  At my parents, “professional” installers left the baseboards and then added quarter round moulding to cover the gap leaving a less finished look.

I borrowed a portable table saw, a chop saw and a laminate cutter.  The cutter was probably meant for thinner laminate since the cuts weren’t very clean with 12mm laminate so I didn’t use it.  When sawing, the good side should be UP when using the table saw or chop saw to minimize chipping the surface.

Next I had to decide if I wanted to use underlay.  Since I was installing on plywood, it wasn’t really necessary but would give the floors a softer feel.  I picked some up at Rona.

With the carpet up, I notice quite a draft coming from one outside wall by the floor.  I noticed the entire wall had been shimmed up about 1/4″ causing a major draft.  I didn’t have any expanding foam insulation so just used a large amount of caulk to try to seal the air leakage.

Back to the flooring.  For the first row, the tongue on the plank needs to be ripped off.  The thickness of the last row also needs to be estimated at this time since you don’t want a 1″ sliver on your last row.  A gap needs to be maintained on the edges to allow for expansion which would be covered by the baseboard.

The instructions indicate joints must be more than 6″ apart so the trick is to stagger the rows while minimizing waste.  I’ve seen installations where the joints on every other row line up and it doesn’t look very natural so I wanted a fairly random stagger pattern.

For the last row, you should measure the thickness at both ends of the plank since the area may not be perfectly square.  I had to redo one plank because of this problem.

Also, I needed to cut around a door jamb to slide the laminate underneath.  A borrowed oscillating saw was the perfect tool to make the cut.

With the floor installed, I replaced the molding and caulked the gaps but didn’t realize I had accidentally purchased clear caulk instead of white since it only dries clear.  Just a minor mistake.

In the entryway, I first removed the existing tile which had been laid on the original vinyl floor.  I contemplated ripping up the vinyl but decided against it.  In the entry way, you do have to worry about the laminate getting wet since water could damage it so I had some tile carpet that I used to rest shoes on.

For the stairs, hardwood nosing would cost about $10 a step while the whole step could be replaced for $30 so I decided against using laminate on the steps.  Replacing the steps will be another future project.
Exchanging Money

It is always good to have some local currency when you arrive in a new country to take transit or a taxi into town.  Airport exchange places usually have terrible rates and may have a fee as well.

If you use ATM’s, exchange rates tend to be good but your bank may add network, atm and foreign exchange fees to your withdrawl.

In Vancouver, I typically exchange money at VBCE or Everforex.  Both have excellent rates and no additional fees.  VBCE tends to carry more currencies than Everforex.

I’ve recently found that exchange rates may be better at your destination country, especially in Asia.  With rates available online, let’s look at some examples.  You will always get a better rate selling foreign currency than buying it.

Remember that foreign coins are typically not accepted for exchange anywhere so they should be spent or donated to charity.

Oct 23 2015

CAD -> HKD

Everforex 5.89
VBCE 5.80
Berlin Exchange (Hong Kong) 5.91 *Best rate*

CAD -> THB

VBCE 25.1
Vasu Exchange (Bangkok)  27.0 *Best rate*
SuperRich 1965 (Bangkok) 26.95


Travel Medical Insurance

Travel insurance is something that is often overlooked when planning a vacation or even heading across the border for a quick shopping or ski trip.  Usually a news story about some person that got injured on vacation facing massive medical bills draws attention to the need to buy insurance.  Some people have coverage through their work extended benefits plans but if you don’t, travel insurance is inexpensive and even cheaper if you don’t need coverage in the US.

I get my travel insurance from Canadian Direct (Travel Underwriters).  You can get a quote and pay all online.  I’ve had a claim before and they air ambulanced me to Ottawa from the US and covered my dad to travel to the US hospital.  If I actually read through my policy, I would’ve known that they covered rentals of both a phone and TV at the hospital.

Here are some quick online quotes from Canadian Direct.  I have added the option for zero deductible which is a 15% surcharge which ends up being very minor.

  • Annual, multi-trip, 5 days, US coverage, $0 deductible – $68
  • Single trip, 14 days, no US, $0 deductible – $30
  • Single trip, 14 days, US coverage, $0 deductible – $42

You can pay for annual and add a single trip if it exceeds your policy’s number of days.

If you get into a car accident in the US, this is covered under ICBC’s Basic Insurance.

Toshiba Regza 46LX177 Attempted Repair Half Screen Dark

I grabbed this TV with the problem of the right half of the screen being dark.  Though I suspected a backlight problem, research indicated a problem with the TAB bonds on the LCD panel.

The problem looks identical to this youtube video with a potential solution.
This suggests a loose TAB bond.

These next two videos show two different repairs of the TAB bond, one with a hot melt glue and the other with rubber shims.

So after watching these videos and with my previous attempt, I figured I was properly prepared to fix this TV.

First step was to remove the stand and the screws holding it in place. Next was to remove all the screws for the back cover. I needed to remove the front plastic bezel to access the front of the panel behind it . Working around the TV, I had to remove the speakers from the bottom, the front LED board and steel supports holding the panel to the front plastic frame.  With the plastic bezel removed, I flipped it over and removed all the front screws holding the front steel bezel in place that held the LCD panel. There was conductive tape on the top that had to be peeled off.

With the front bezel removed, I plugged it in and powered it up and started poking at the rightmost TAB bond with a plastic pen. This seem to fix the screen.  I poked at the other bonds to see if other bonds were flaky and some produced lines on the screen when touched. The far right bond tab was the main culprit of the dark right half picture and verified the results in the youtube videos.

I made a shim for that connector with some draft insulation and put the bezel back in place since the bezel is required to push down on it. Powering the TV back on, it appeared there wasn’t enough pressure since the darkness came back. I removed the bezel again with the TV on and then vertical lines started to appear on the far left side of the TV. I probably screwed up and shorted the circuit board on the left top of the panel. I should have shut the TV off before removing the bezel again since the panel appears damaged and removing the bezel was the only thing I did to create the lines.  I also noticed that the long circuit board had two conductive bumpers probably to ground the boards and to keep the circuits from touching the bare metal inside of the bezel. I would have needed a much thicker shim in order to create more pressure on the TAB bond.

I figured the panel was probably damaged and I should try to put the TV together as an exercise and practise.

For the front metal bezel, the panel was set in a plastic frame so I didn’t have to worry about the LCD panel being in the correct position. I also made sure to hand tighten the front screws in order not to crack the LCD panel.

When I got around to attach a metal support piece at the bottom of the TV, I couldn’t figure how it got there in the first place and not sure of where to put the screws. It didn’t really matter since the TV was trashed but the lesson here is to take lots of pictures and maybe mark screws and locations with nail polish or tape. I ended up not putting back the metal support nor the screws in that section.

So here are the lessons from this attempted repair

  • Repairs are not as simple as shown on youtube.
  • Turn off the TV to minimize chances of shorting a board
  • TVs with vertical lines could have non-repairable LCD panels. Easiest repairs will be a TV that won’t turn on with the most likely cause being bad caps.
  • If opening up your TV, take lots of pictures.  Mark screw locations with masking tape or nail polish.
  • If removing a front bezel to access TAB connectors, be super careful.  Hand tighten screws just lightly or you will crack your LCD panel.  It may also be better to do this with the TV powered up since you will be able to see if the screw is too tight since it will start affecting the picture.

Replacement Vinyl Windows

One of the first major renovations I undertook in 1997 after I bought my house was to upgrade the aluminum, single pane windows with double pane vinyl windows.  Being older, my house is pretty leaky so I didn’t need low-E, argon filled, triple pane windows.  Basic double pane, vinyl slider windows with screens and drop-down locks was sufficient.

The first quote I got for 13 windows was $7469. Yes, I kept all my quotes.

Second quote was $5107 (12 windows) so there was quite a big difference.  The extra window not include here was probably the  single pane decorative glass panel above the entry doors.

Third quote was for $4430 (12 windows).

For major jobs, ALWAYS obtain a written quote so you can compare the total price including taxes and any extra fees.

I liked the style of the windows from the second company better and they said they would price match the lowest quote.  Their quote included tax, screens and installation.

To save some money, I ended up leaving 5 windows unchanged paying $3046.  In hindsight, I should have gotten a loan or bit the bullet to get them all done.

I was home when they did the replacements.  They first took the glass out and then pryed out the aluminum sills.  Some replacement window systems leave the sills in but removing them is better.  The new windows have a “rebate flange” on the outside which was caulked all around and the frame was screwed from the side rails.  In my house, the internal wooden frame was “floating” which the installers didn’t notice.  This caused the interior moulding to have gaps so they had to go back and rescrew some windows.  They also replaced one sill that had rotted.

Eighteen years later and I still haven’t got around to replacing the remaining windows.  Prices have probably gone up and I don’t think the company I used, West Coast Designed Windows, is still in business.   There could be a problem matching the window style but I chose a pretty generic looking slider window.  I will probably attempt replacing most of them myself at some point since all (except for one) is at ground level.


Zenith Z32LCD4 TV Repair – No power

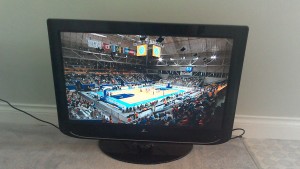
I came across a free, broken 32″ Zenith model Z32LCD4-UK.  An attempted repair was made before since the power supply board was already pulled out of the tv.  Inspection of the board showed several obvious blown capacitors which were bulged up on the top.   The values I needed were 2 x 3300uF/10V and 2 x 680uF/35V.  Once they were replaced, the TV powered up with no issues.

Jpeg
Repaired Zenith TV