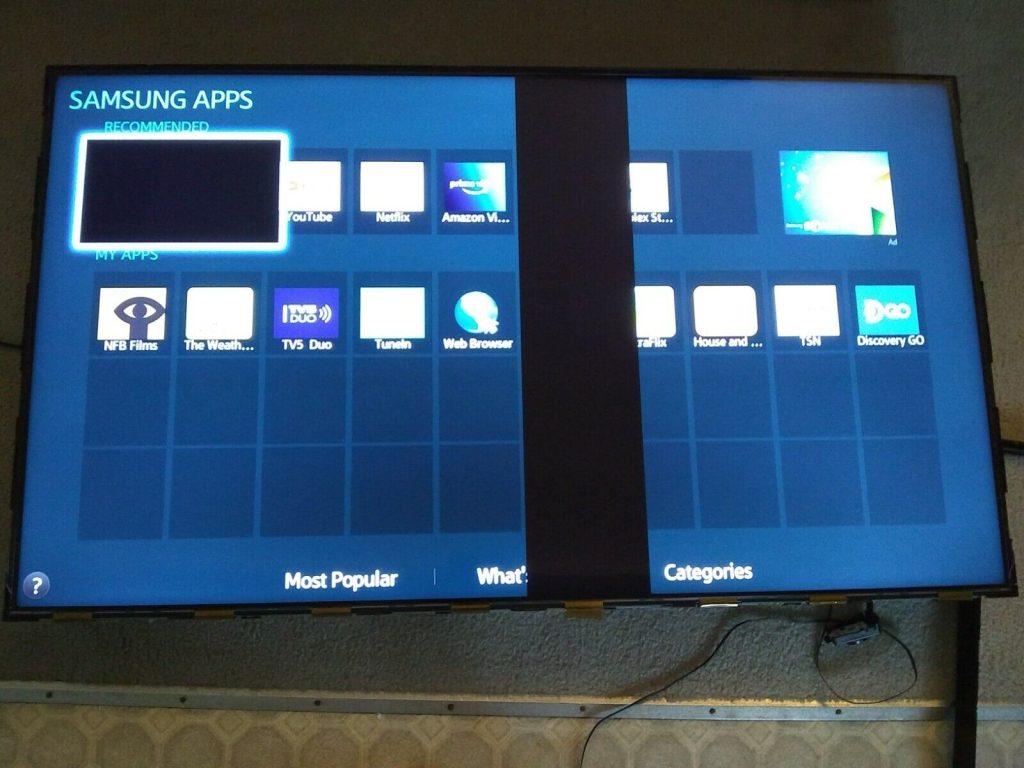
I grabbed this TV with the problem of the right half of the screen being dark. Though I suspected a backlight problem, research indicated a problem with the TAB bonds on the LCD panel.
The problem looks identical to this youtube video with a potential solution.
This suggests a loose TAB bond.
These next two videos show two different repairs of the TAB bond, one with a hot melt glue and the other with rubber shims.
So after watching these videos and with my previous attempt, I figured I was properly prepared to fix this TV.
First step was to remove the stand and the screws holding it in place. Next was to remove all the screws for the back cover. I needed to remove the front plastic bezel to access the front of the panel behind it . Working around the TV, I had to remove the speakers from the bottom, the front LED board and steel supports holding the panel to the front plastic frame. With the plastic bezel removed, I flipped it over and removed all the front screws holding the front steel bezel in place that held the LCD panel. There was conductive tape on the top that had to be peeled off.
With the front bezel removed, I plugged it in and powered it up and started poking at the rightmost TAB bond with a plastic pen. This seem to fix the screen. I poked at the other bonds to see if other bonds were flaky and some produced lines on the screen when touched. The far right bond tab was the main culprit of the dark right half picture and verified the results in the youtube videos.
I made a shim for that connector with some draft insulation and put the bezel back in place since the bezel is required to push down on it. Powering the TV back on, it appeared there wasn’t enough pressure since the darkness came back. I removed the bezel again with the TV on and then vertical lines started to appear on the far left side of the TV. I probably screwed up and shorted the circuit board on the left top of the panel. I should have shut the TV off before removing the bezel again since the panel appears damaged and removing the bezel was the only thing I did to create the lines. I also noticed that the long circuit board had two conductive bumpers probably to ground the boards and to keep the circuits from touching the bare metal inside of the bezel. I would have needed a much thicker shim in order to create more pressure on the TAB bond.
I figured the panel was probably damaged and I should try to put the TV together as an exercise and practise.
For the front metal bezel, the panel was set in a plastic frame so I didn’t have to worry about the LCD panel being in the correct position. I also made sure to hand tighten the front screws in order not to crack the LCD panel.
When I got around to attach a metal support piece at the bottom of the TV, I couldn’t figure how it got there in the first place and not sure of where to put the screws. It didn’t really matter since the TV was trashed but the lesson here is to take lots of pictures and maybe mark screws and locations with nail polish or tape. I ended up not putting back the metal support nor the screws in that section.
So here are the lessons from this attempted repair
- Repairs are not as simple as shown on youtube.
- Turn off the TV to minimize chances of shorting a board
- TVs with vertical lines could have non-repairable LCD panels. Easiest repairs will be a TV that won’t turn on with the most likely cause being bad caps.
- If opening up your TV, take lots of pictures. Mark screw locations with masking tape or nail polish.
- If removing a front bezel to access TAB connectors, be super careful. Hand tighten screws just lightly or you will crack your LCD panel. It may also be better to do this with the TV powered up since you will be able to see if the screw is too tight since it will start affecting the picture.

