All posts by admin

Insignia NS-50D40SNA14 Backlight Turns Off Problem

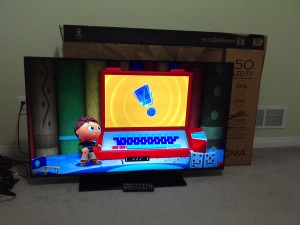
This TV had a problem with the backlight shutting off after some time which would come back if the TV was turned off and back on again.  This problem is often described as no picture but still have sound.  You can use a flashlight to confirm the backlight has gone out.  Googling the problem led to a post from  someone who was able to resolve this problem by replacing the power supply board.

Being a newer TV and with a LED backlight, the TV only has three boards inside – power supply, main and T-Con.  Inspecting the power supply board, there was no evidence of bulging capacitors but they are suspect in any power issue.

I replaced  a few high voltage and high capacitance electrolytic caps ordered from Digikey.  Values and designators were CEL2 – 56uF/160V (Digikey P/N 493-4794-1-ND), CEL1 & CEM7 – 82uF/100V (Digikey P/N 565-4012-ND) and CES6 – 1500uF/16V (Digikey P/N 1189-1881-ND, was probably ok).  I assumed the L suffix was for backlight, M suffix for main, and S suffix for standby.

After capacitor replacement, the screen seemed ok after 18 hrs of being continuously on.

Update: More experience with LED TV’s indicates backlights shutting off are caused by failed or failing LED backlights.  Turn down the backlight level to increase the longevity of the LEDs.  If the backlight does not stay on, the LEDs will need to be replaced.
IMG_20151202_092217

Adsense Ads in the Sidebar with WordPress

For my Adsense ads, I used the official Adsense plugin but the plugin didn’t allow me to place ads in the sidebar.  I googled the problem and was not able to find a solution.  In order to get a rectangular ad in the sidebar, I dragged a text box into the sidebar widget area and then cut and paste my adsense code in there.  I made sure I only had two other ad units with the plugin since there is a three ad limit with adsense.  You need to check the ad placement with all your page styles (home, posts, and pages).


Touch Dimmer for Table Lamps

My table lamps were over 20 years old, dated and the shades had faded and the plastic was disintegrating.  I looked for replacements awhile ago but was looking for something with a tri-light switch since it is nice to be set them at different brightness levels.  Tri-light incandescant bulbs don’t seem to last and are also available in CFL versions.

I found some more modern lamps at the Target liquidation sale and snapped them up even though they weren’t tri-lights.  I got LED bulbs for them since they tend to be on all evening.  I was going to get a slide dimmer but end up finding touch operated dimmers that operate with metal lamps.  I found these at Princess Auto though Canadian Tire has them as well for quite a bit more.

Philips 47PFL7422D/37 Left Half of the Screen Dim Repair

I got a hold of a Philips LCD TV with the problem of the left half of the screen dim.  Researching on the badcaps.net forum indicated the problem was most likely the caps on the slave backlight inverter board which also blows a SMD fuse.

Removing the back panel, the first obstacle was Torx screws.  Luckily I had a Torx T10 screwdriver.  Once I got access to the slave inverter board, I inspected the caps and they were not bulged but the fuse tested as an open circuit.  The forum indicated the caps should be 680uF/35V but the ones on the board were 820uF.  I found an image of the board online which matched the 680uF value.  Since I had some spare 680uF caps, I decided to use those.  The SMD fuse was difficult to remove with one soldering iron so I ended up just shorting it.  I did find a suitable replacement fuse on Digikey (P/N 507-1057-1-ND).  After putting the board back in, the backlight was working at full brightness.  However, there were some semi-circular shadows on the screen within the panel.  Don’t think this can be fixed  and it’s not worth the risk of damaging the panel to investigate further.  Some online posts indicate this could be fixed by rubbing the area with ice packs but this didn’t work for me.

Squeaky floors Squeeeeek-No-More Review

Floors squeak due to floor boards that are nailed to joists becoming loose over time.  Newer construction techniques use glue and screws to minimize squeaking.  After watching “Ask This Old House”, they featured a repair system with a depth guide and screws with break-away heads called “Squeeeeek-No-More”.  I picked this product up in Home Depot in the US for $20 in the carpet section of the store.

The hardest part of the repair is finding the joists.  The instruction manual suggests going 9″ over from a wall and assume that joists typically run in the direction of the shorter length of a rectangular floor plan on 16″ centers.  The kit includes a special screw with a hex head and long straight shank to help locate joists.

My subfloor is constructed with diagonal 1″x 6″? boards with plywood on top (original wood floors removed) and then underlayment and pile carpet.

I found it pretty hard to find the joists and initially the joist was running the opposite angle I had assumed.  Even after locating the joist (the screw will stop spinning), the squeaks were improved but not eliminated.  I found with pile carpet,  I could use trimhead 3″ screws instead of the Squeeeeek-No-More screws.

I will be returning the system and have given up on fixing the squeaks until I replace the carpet.

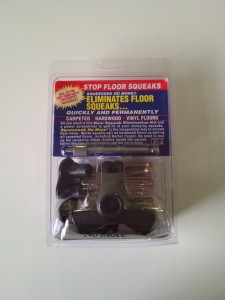
Squeeeeeek No More

Switch Guards for Motion Sensor Lights

I switched all my outdoor lights to motion sensor activated ones for convenience, security, and to chase away animals.  One problem is that they get accidentally turned off which defeats the whole purpose of having motion lights.  The solution is to use switch guards which I’ve only been able to find in the US including Home Depot.  They cover the toggle switch and minimize the chance of the switch being turned off but still allow access from one side.

Toilet Handle Lever Repair

The toilet tank lever broke and I figured it would be an easy repair.  It is just a nut holding the handle in place but I had trouble unscrewing it out.  Giving up temporarily, I headed to Home Depot anyway to get a universal replacement.  They come in different lengths so measure or bring your old lever to compare.  Back to removing the old handle,  I ended up breaking the handle off and using a hacksaw to cut it off.  With the replacement handle, again I had trouble removing the nut and after checking the instructions, it indicated to turn the nut counter-clockwise to tighten.  It is reverse threaded to prevent it from loosening when flushing the handle.  The flapper chain was attached to the old handle with some wire that I had to cut and then I temporarily used a paper clip to attach it to the new handle.  This will eventually rust so I’ll need to go back to Home Depot to grab a proper retaining clip.  Though it seemed basic, a quick google search would have saved me a bit of time and frustration.

Keeping your Airline Mileage Points Active

If you don’t travel regularly but collect airline mileage, your points may expire due to inactivity.  I’ve lost a bunch of mileage with Alaskan Airlines by losing track.

With most airlines in alliances like OneWorld and Star Alliance, it is easier to collect points and join only a few programs. You can enter your membership number during online check-in.  It is a major pain to claim mileage after a flight had been taken since you need to mail your original boarding passes and tickets.

With both United Mileage Plus and America Aadvantage, points will expire after 18 months of your last activity.  Being in Canada, I found the best way to keep your account active is to sign up with their affiliated dining programs and cross the border to Bellingham for  lunch and a shopping trip.  American and United use the same program but branded to their own airline.  You register separately for it and link a credit card and your mileage account.  All you need to do is to have a meal at a participating restaurant and charge it to the credit card you have registered.  Mileage should appear on your account in a couple of weeks.  They used to have Canadian restaurants in the program but that ended several years ago.

The only other frequent flyer program I’m enrolled in is Delta Skymiles and mileage doesn’t expire with Delta.

Costco Pharmacy – Lowest Price for Prescription Drugs – No Membership Required

I had let my Costco membership lapse and had to get my regular prescription drugs filled elsewhere.  I got it filled at Real Canadian Superstore and the cost was significantly more than I was paying at Costco.  I considered renewing my Costco membership just so I could save on my drugs.  I then found out that a membership is NOT required to use the pharmacy at Costco.  Pharmacy laws protect against discrimination.  Costco’s dispensing fee is $4.49 currently and drug prices are also lower, especially generics.

To get by the employee at the entrance, just say you are going to the pharmacy.  They will also ask for your membership card when paying but it’s ok to say you don’t have one.  Recently,  Canadian Costco’s switched to Mastercard from American Express so you can pay by credit card instead of debit.

Update

Here is another tip to save time.  You can fax in your prescriptions and you don’t need a fax machine.  Get the pharmacy’s fax number.  Scan your prescription or take a picture with your smartphone.  I use faxzero.com to send it.  Costco will send you a text when it is ready to pick up and you will need to bring your original prescription in.