All posts by admin

Philips 32PFL3505D/F7 No Power

This TV wouldn’t power up.  It shares the same boards as 32PFL3515D/F7.   I found a service manual here

The fuse was not blown and I couldn’t measure any voltage at the output of the transformer which should have been +34VDC.  I checked all the diodes in this part of the circuit for shorts and didn’t find any.

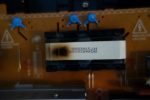
When I removed the board to check continuity at the AC input part of the board, I found an open circuit at the inverter power connector.  I then noticed a large crack in the PCB that had disconnected all three of the power connector outputs as well as the ground plane on the hot side.

I jumpered the cracked section with three wires, turned the TV on and it powered up.

Edit:  I tested the TV for a couple of hours and when I restarted it, I encountered another problem.  The TV powered up with the Philips logo and promptly shutdown.  This behavior is an indication the TV is going into protection mode.  See the solution here.

LG 42LG50 No Backlight or Sound but No Picture

A long thread on the badcaps forum indicates a blown fuse on the master inverter board is the suspect part with this failure.  The TV will turn on which is indicated by a very faint blue front LED that changes from red.

The master inverter board is the one closest to the power supply board and on your left looking from the back.  The fuse is just below the middle connector.  The fuse in question is black, marked “15” with designator F1 and marked 0.75A/76V.   When I was checking the fuses, I missed this one since there are a few white ones labelled with 3A/63V.  A multimeter confirmed it was blown and  I temporarily shorted this fuse to confirm that the TV came on with the backlight.

It may be easier to solder without disconnecting the inverter board since there are multiple connectors for the CCFL bulbs.

Looking for replacements on Digikey, I came up with part #F2927CT-ND which is a 1A, 75VDC 1206 (3.18mm x 1.58mm) fast blow SMD fuse.  I increased the current rating to 1A to provide a bit more margin since the badcaps thread indicated peak current is close to the 0.75A rating of the old fuse.

After replacement, I ran the TV for a couple of hours to make sure the fuse wouldn’t blow again.

Also on this TV, the original stand support had broken off at it’s base.  You can find the support piece on ebay by searching the part number MJH40310802 which is also stamped inside of it.

Reducing Background Cellular Data Usage on an Android Lollipop Phone

I am on a 100MB/month plan which I primarily use to check email but I had been getting large downloads happening in the background.  Steps I did to limit the amount of data include the following:

  1. Use the My Data Manager app.  Though there is built-in data usage tracking within Lollipop, the app provides notifications and more detailed statistics.
  2. Configure Play Store to not auto-update apps.  This option is set within the Play Store app.   Menu bar icon -> Settings -> Auto-update apps.  You can set it to update over wifi only as well but I turned it completely off.
  3. Disable sync settings for Google Accounts.  This is under Settings (main) -> Accounts -> Google -> Your account name.  I turned off sync for everything except Gmail.  Android tends to install new google features which you will need to disable the sync for.
  4. Optional.  Restrict Background Data.  I’m still unsure if gmail will be checked in the background if this is turned off.  I have left it enabled but to disable it, go into Settings (main) -> Data Usage and it is hidden under the extended menu with the 3 dots in the top right corner.  You will have a warning in your main notifications  with it disabled.
  5. IMPORTANT.  Turn off Google Play background data.  This option was probably causing my large downloads.  Go into Settings (main) -> Data Usage and find Google Play Store under App Usage.  It needs to download some data first in order to be displayed in this list.  Click on Google Play Store and you will have the option to Restrict app background data.  Repeat this step for any other app that is downloading large amounts of data in the background.

Samsung LN40B540P8F LN40B540 Power Problems Won’t Turn On

This Samsung TV has a newer design with a combined inverter/power supply board part number BN44-00264B.   Inspection of the board showed no signs of bulged capacitors and no blown fuses but there was a burnt spot on one of the inverter transformers.  Research on badcaps.net indicating replacing the transformer would fix the TV.  It is curious the transformer in the same position fails which would indicate a design problem versus a faulty part.

Searching the transformer part number QGAH02095 found multiple sellers on Ebay selling the part anywhere from $1 to $10.  I bought the cheapest one though I’ll need to wait 4-8 weeks for it to be delivered.

Update:  I waited almost 6 months for the part but it still didn’t show up so i re-ordered it from a North American seller.  After the replacement, the TV powered up with no issues.

Update 2: Got another TV in with the same symptoms that uses the same power supply board.  Model is LN40B500 LN40B500P3F LN40B500P3FXZA

I would also recommend replacing the following electrolytic capacitors on this board.

CM861, CM866 – 1000uF/10V
CM862, CM856 – 470uF/25V
CM858, CM859 – 2200uF/10V
CM853, CM854, CM855 – 1000uF/25V

Cheap CR123A CR2032 Batteries In Canada

A couple of months ago, the batteries on my Honeywell wireless smoke detector were low and I was looking for inexpensive replacements.  The batteries are used in other Honeywell sensors as well.  The best deal I could find on Ebay were Panasonics shipped from Germany.  I checked Walmart in the US but the Rayovacs I had found previously were not in stock and no longer on their website.

While looking for 9V alkalines at Dollarama (fairly good deal at $2.50 each), I spotted the Panasonic CR123A batteries for $3.  Dollarama is also a good source for CR1032 button cells. Not all stores may carry them so you may need to search a few different ones.

Update:  The CR123A seem to be no longer available at Dollarama.  I ordered some on Amazon.ca from a third party seller for around $8 for two pieces including shipping (around 2 weeks for delivery).  MEC also carries them for about $6 each and Princess Auto has Westinghouse brand for around $6

Keywords: cheap, inexpensive, CR123, CR123A, battery, batteries

Samsung LN40B500P3F No Power Doesn’t Turn On

Opening up the back of this TV, it is a relatively newer design with a combined power supply/inverter board.  There were no big capacitors which are the usual suspects with this failure.  This TV uses model BN44-00264A power supply.  There are a few posts on badcaps.net about this problem with the likely suspect failed FET transistors.  With the back opened, I tested the two fuses on the combined power supply/inverter board and FM802S was blown.  If you replace the fuse, it will just blow again.  I removed QI820 and QI821 and they tested as shorts on my ESR meter.  The FETs are a little tricky to remove since they need to be unscrewed from the heatsink and the drain and source pins have small grommets in the holes.  I ordered replacements on Digikey: FETs are part# FDPF7N50U_G-ND and the fuse is F2376-ND.

After replacing the two FETs and fuse, the TV powered up with no issue.

Troubleshooting Christmas Icicle Lights and How to Determine Bulb Voltage

After putting up icicle lights at the parents, quite a few of the strings had half or full sections with no light.  It is difficult to trace the wiring to see how they are wired.  Mini lights are wired in series so that if one bulb goes out, the whole string will be out.

Research indicated that the bulbs have a shunt so if the filament burns out, the bulb should short circuit so the string stays lit.  The higher voltage caused by the burnt out bulb should cause the shunt to fuse together.  Sometimes, the shunt fails causing the string to stay dark.  There is a tool called the Lightkeeper Pro that sends high voltage into your string to force bulbs where the shunts have failed to fuse together.

In my 100 light string, there are two sets of series 50 light strings  which are wired in parallel.  So even if both strings have a disconnect, power will pass to the next string.  To determine how many sections your string has, you need to pull a bulb from a good string.  If half the lights go out, you have two sections.  A third of the lights going out will indicate you have three sections.

It was difficult to find replacement bulbs at both drug stores and hardware stores.  I found some 2.5V mini replacements at an independent dollar store though it looks like Canadian Tire and Rona is also a good source for bulbs.  The bulbs don’t include the plastic base so don’t throw those out.

To determine the bulb voltage, you need to count your number of bulbs in each SERIES section.  120V divided by that number is your bulb voltage.  So 2.5V is good for 50 bulbs (and multiples wired in parallel), 3.5V for 35 (and multiples), and 6V for 20 bulbs.

I ended up going through the tedious process of testing each suspect bad bulb (by placing each in a lit string) and randomly ended up getting all the strings lit up.  The problem was likely a loose connection somewhere and not a bad bulb.

The dollar store and Canadian Tire 2.5V replacement bulbs I bought popped right away so they were bad or mislabelled.  2.5V replacement bulbs I bought at Rona worked fine.  It is recommended to replace burnt out bulbs since more current will be flowing into your string and could burn out the rest of your bulbs quicker.

I have a knockoff Fluke contactless AC tester I bought off Ebay and this could be used to check for a broken connection.  If your tester is too sensitive, it probably won’t be useful.  Here is a guide from Fluke on holiday light testing.

Samsung LN40D550 LN40E550 Dim Right Half Screen Repair

I picked up this TV with the issue of having a dim right half of the screen.  Brightness controls did not do anything.  I had fixed a TV with a similar issue here.

The power supply part number BN44-00440A is hidden within the serial number and this post on badcaps.net indicates a potential cause is a failed capacitor CP811.  I measured the voltage across one of the big filter caps and it was only 160V DC (should be around 380V DC).  This reading indicated the backlights were not getting full power.  The original part is 220pf/1KV so it may be better to replace it with a higher rated voltage (2kv or 3kv).

I pulled out the capacitor and put it in my ESR tester and it tested as a 0 ohm resistor so it had shorted out.  When I replaced it and powered up the TV, the backlight came on at full brightness.


Install Android Lollipop on Asus ME301T Tablet

My old Asus ME301T had been acting up lately.  Its been running slow and all the cleaning and boosting apps didn’t really work so I contemplated reinstalling the OS.  I had updated the stock Jellybean to Kitkat 4.4.2.  See post here

I found a homemade Lollipop 5.1.1 ROM described here and that can be downloaded here.  Steps for this upgrade are as follows (assuming you have TWRP installed).  If you have game data you want to save, you can back it up and restore it with the Helium app.

  1.  Boot into recovery mode.  An option may be presented if you hold down the power button to power down.  Second option is to power off and then hold the vol down key and hit the power key.  You should get recovery options.  Select RCK with the vol up button (vol down will cycle through the choices.)
  2. With TWRP recovery, I backed up my system and data (everything except cache) onto external SD card.
  3. Move the download 5.1.1 zipped ROM image to the SD card.  Download GAPPS for 5.1.1  You will need GAPPS to install Google Play Store so you can download Chrome and Gmail.  I found a link here and downloaded the pico version for a minimal installation which only includes the Play Store.   This should also minimize the google bloat with apps you don’t use and can’t uninstall without rooting your device.  The pico version also does not include any sounds or wallpapers and you will need to download those separately.
  4. Format the internal memory with TWRP.  You can remove the external SD card to be extra safe.
  5. Install the ROM Image and then GAPPS.  Wipe the Dalvik and cache when asked.
  6. Reboot and you should be running 5.1.1

Update: I actually reverted back to Kitkat since I couldn’t save my progress in a few King games I had.  I had tried the Helium Backup app but it couldn’t connect to my tablet via USB.  I just replaced the micro-USB connector since it was worn and decided to give Helium a second try since it may have been a bad USB connection.  This time it worked so I restored the Lollipop install that I saved.

I have been running Lollipop for a few days and it’s like having a new tablet.  No more slowdowns and sluggish performance.

Update 2:  USB OTG doesn’t seem to work with this version.  It was fine with Kitkat and I could plug in USB drives, keyboard or mice before.


Mac OS X Reinstallation or Install on New Hard Drive or No Boot

I got a hold of broken 2007 Imac which couldn’t boot.  The progress bar would pop up and then the system would shut down.  I was told the Imac was missing a hard drive.

Taking apart the Imac was a little tricky since you needed a suction cup to remove the magnetically connected glass panel.  I used my smartphone windshield mount.  A Torx T8 screwdriver is needed to remove the LCD panel and Torx T6 screws holds down a LCD connector.  With the panel off, I noticed that there was a 1TB hard drive in the Imac.

The machine was a bit dusty with brown dust which is an indication the previous user was a smoker.  I vacuumed the dust up and cleaned the glass with a foaming glass cleaner.

My next step was try to boot to recovery mode by holding down the Command and R keys when you hear the startup chime.  I was able to get into the recovery screen which installs the recovery image onto a Ramdrive.

With the Disk Utility, I erased the drive.

I first ran the Reinstall Mac OS X utility (for Mountain Lion).  It wanted to connect to the internet (you can set up the wifi to connect) and then asked for an Apple ID in order to do the reinstallation.  Researching indicated that Mac OS upgrades are tied to users and not machines.  There is an internet recovery mode that will download the original OS that was on a Mac but this only works on machines built in 2011 or newer.

I had the original OS CD so I put it in the drive and rebooted.  You can hold down the C key to boot off the CD when you hear the chime or hold down the  Option key which will then ask you what device you want to boot off.  After a while, it booted back into the Mountain Lion recovery mode.  It appeared that the CD was damaged.  I confirmed this by booting off the same CD with an external USB CD drive.

I next attempted to recover the CD onto a USB with the Disk Utility.  I first partitioned the USB drive as GUID format so it was bootable and then recovered the CD onto the USB.  Though it took a couple of hours, the USB didn’t boot and it went into the Mountain Lion recovery.  I tried a second time and had the same result.

I ended up finding an OS image and was able to put it on a USB drive.  I had to rename the file and remove the spaces in order to “Scan Image for Restore” with Disk Utility (accessible through the top menu options).

Once I had a good image on USB, the computer booted from it and guided me through the installation process.  The imac then booted cleanly without any issues.

Though the Imac with a 24″ screen is nice, I didn’t need a third home computer.  If I did need a mac, I can install mac OS onto a virtual machine on Windows.

A 2007 dual core Imac can run El Capitan quite comfortably if you upgrade the memory.  This model can take up to 6GB of RAM.  1080p video played smoothly.