All posts by admin

Philips 52PFL3704D/F7 No Power

This TV had no power at all and no standby voltage.  There is a repair kit available for the power supply board DPS-411AP-1 at Shopjimmy.   There is a service manual online but no schematic for the power supply board.

Advice on badcaps suggested looking at the circuitry around IC901 (ICE3BS02G) which generates standby voltage as a separate circuit from the incoming AC.  Components to check include F2 (small red fuse),  R929, R903 and Q905.  R929 was open and I replaced it with a 2.2ohm 1/4 W fusible resistor.  It blew when I plugged it in and there was also visible damage on IC901.  I tested Q905 on my ESR tester and it was not shorted.

ICE3BS02G is obsolete but the manufacturer lists ICE3BS03LJG as a replacement and this part was available at Digikey (part #ICE3BS03LJGXUMA1CT-ND).  I also ordered a 1 ohm fusible resistor to replace R929 (Digikey part #1.00DCCT-ND).

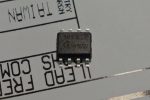
When the parts came in, it was difficult to find the pin 1 marking on the IC.  Taking a pic of it, you can see it on the bottom left with the markings upright.

With the two parts replaced, the TV powered up.
RCA RLDED5078A-D No Backlight

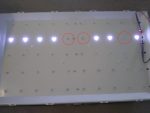
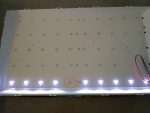
This TV turned on but had no backlight. Suspecting bad LEDs, I took off the back cover and found the connector supplying the LED strips. There were six pairs of red/black wires which meant each strip was powered individually. I unplugged the connector and probed each set with my LED tester. I found that the top strip did not light up and the tester didn’t read a voltage which pointed to open LEDs. Taking apart the panel, I removed the strip and was able to change the bad LEDs with ones from a spare strip I had with similar voltage. My hot air reflow tip browned the area underneath the LED which casts a slightly noticeable shadow. This model doesn’t have a backlight level setting so I turned down the brightness.

Update: This TV came back with more LED failures on the same strip.  I ordered backlights on ebay but they didn’t match.  There are a least two different chassis used for this model.  My strips are IC-A-CNA050D173L &  IC-A-CNA050D173R.  These strips match model numbers Element ELEFW502, Seiki SE50FY10 and Westinghouse DW50F1Y1.  The other chassis uses the same strip throughout.

The backlight level can be lowered in the service menu.  With the TV on, hit menu – 1 -1 -4 -7 on the remote.  It may be under the panel setting.

I ordered a new remote and this didn’t work either since there appears to multiple versions of this model.

LG 42LN5700 Logo Flashes No Picture Has Sound

Failure of the LED backlight seems very common with the LN series from LG.  50LN5600 is another model with LED failures.  With the panel opened up, I found one bad LED with my LED tester.  I ordered a replacement right strip from a seller on Aliexpress for about $10 USD shipped epacket (typical 1-3 weeks to Canada).

Update: I am encountering quite a few failed 42LN5700 models with failed backlights.  It appears this model was a freebie given out by Telus for subscribing to Optik TV service.

Update 2:  It is recommended with backlight failures to replace all the strips with new vs repairing the bad ones.  All the LEDs have wear and are destined to fail.  LG LN Series Bad LED Backlights

There are a few videos on Youtube showing how to do LED replacement which is much cheaper than replacing the strip.  3V 2538 replacement LEDs for LG can be found fairly cheap on Aliexpress. Search LATWT470RELZK. 32″ LG TV’s may use 6V LEDs.

I have a hot air rework station to do the replacement. With the LG strips, you first need to pop off the lens with a screwdriver. Peel off the circular backing since this will melt under heat. I usually don’t add extra solder but do add some flux before soldering the new LED. Attaching the lens back is tricky since it has to sit level and be centered. I scrape off the old nubs with a razor scraper and use crazy glue with Zap Kicker accelerant dapped with a q-tip on the lens side.

I leave all the boards connected and remove just the LCD panel and the diffuser panels. With the LCD panel disconnected and TV plugged in, the LEDs should light up.

It is recommended to turn down the backlight level and install the latest firmware after replacement.

Officejet 6500 E709n Won’t Print – Clogged Printhead

My dad’s Officejet wouldn’t print so I tried the cleaning cycle with no success. With inkjet printers, ink will eventually dry up and clog the printhead.   I previously had an Epson 600 inkjet printer which I had to take apart to clean the printhead.

With the Officejet, the printhead is removable for cleaning.  HP has instructions on it’s website and a video on youtube showing a cleaning procedure which involves soaking it for 15 min in hot distilled water.  I tried both a 15 min soak in isopropyl alcohol and running it under a hot tap and it was still clogged.   What did work for me was a 24 hr soak in alcohol.

  1. Remove your ink cartridges, wrap them in a moist paper towel and place in a ziploc bag.
  2. Lift up the grey lever to remove the printhead.
  3. Soak the printhead for 24hrs in a small plastic tub filled with isopropyl alcohol.  I used enough to cover the input nozzles.
  4. After the soak, rinse it with distilled water and let dry.
  5. Reinstall the printhead and cartridges.

If the above doesn’t work, you can try repeating the soak.  As a last resort, replacement printheads are available on ebay.

Acura RSX Window Trim Molding Peeling Paint

The paint on the bottom molding on my driver’s side window was cracking and peeling exposing the chrome underneath.  Replacement pieces are $61 USD part numbers 72450-S6M-003 (left) and 72410-S6M-003 (right).  Online forums suggested  repainting it instead of replacing.

Removal is fairly simple and there are some online videos on the procedure including the one below.   Lower your windshield and twist it out from the pillar side first.

Once it is out, give it a good cleaning since it gets gunky.  Using a razor scraper, scrape the paint off the exposed surface.  I went a little too far and scraped the edges and ending up showing a small gap when I reinstalled it.   Just scrape the front face.

Once I got  rid of all the peeling paint, I sanded it down with some 150 grit sandpaper.  I then cleaned the surface with rubbing alcohol.  Next I masked off the edges with painters tape to prepare for painting.

You can use spray on truck bed liner or plasti dip but I just used flat black enamel spray paint.   I gave it two coats with a bit of drying time between coats.  I did get some bubbling so you should spray outside the area first to clear any air inside.  Don’t apply it too thick or else it will run.

I did miss a narrow strip at the bottom so will need to redo a bit of it and will repaint my wiper arms at the same time.

Update:  Had to do the passenger side as well since it has started peeling.  The drivers side has held up well.

LG 60PK550 Turns Off Power Problems

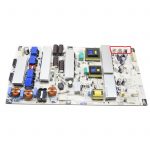
A common failure of this TV is a blown fusible resistor on the power supply.  There are three rectangular cement resistors at the corner of the board –  R927, R928 and R929  They should be marked 10 ohm and 5W.  They can be measured in circuit though out of circuit is more accurate.  All three should be replaced though typically only one blows..

Equivalent part can be obtained from Digikey part number TWW5J10RE-ND

Samsung LN46A550P3F Washed Out Screen or Colour Issues

Other model numbers:  LN46A550 LN46A550P3FXZC

A washed out screen or colour issues is a classic failure of the AS15F chip on the Tcon board.  It is difficult to replace because of the fine pitch of the package and replacement IC’s need to be ordered online.  It is easier to replace the whole board but used boards could also have the same failure if not tested beforehand.

For this TV, I also proactively replaced the Samwa capacitors on the power supply board BN44-00202A.  Values are as follows:

  • CM871, CM872 –  470uF/25V
  • CM876, CM881 – 820uF/25V
  • CM852, CM853 – 1000uF/10V

I tested the old capacitors and found one of the 820uF capacitors was open circuit.  There was no visible damage on the capacitor (no leaks or bulging).

The TV worked fine after the repair

Samsung LN32C540 No Sound, No Picture, No Backlight

Other model numbers:  LN32C540 , LN32C540F2D, LN32C540XZC

This TV would go through the process of turning on but there was no backlight nor picture.  The front led would flash a few times and then go out.

All voltages tested good coming from the power supply but the main board did not appear to be sending the BL_ON (backlight on) signal.  When I disconnected the cable between the power supply and main board, the backlight came on.

Researching on badcaps, the main board appeared to require replacement.  The part number was 96-14917A.  I was able to find only one used board on ebay with part BN96-15158A.  According to Shopjimmy, the board was one of many direct substitutes.

With the new board installed, the TV powered up with a picture.

Since the capacitors are all crappy Samwa, I proactively replaced them.  Values for BN44-00338B are as follows.

CM858, CM859 – 1000uF/25V
CM853, CM854, CB851 – 2200uF/10V
CM851, CM852 – 1000uF/35V

CM808 – 18nF/630VDC polypropylene capacitor is also a common failure.  Digikey substitute part is 495-7139-ND.

Samsung LN32A450 No Power

Other model numbers: LN32A450C1D and LN32A450C1DXZC

This TV uses a BN44-00214A (Dongyang MK32P5B) power supply board.  Schematic available here.  Opening the back of the TV, I found one bulged capacitor CM858  which I replaced.  The TV still had no power so when I checked the main fuse,  it was blown.  I replaced it with an 8A I had available.  I plugged the TV in a second time but this time I created some sparks.  A jumper by the big filter cap had blown apart along with the leg of one capacitor beside it.  The main filter cap had also bulged.  Researching the board number on badcaps found this board has an issue with the glue used to cover pins .  The glue drys out over time and becomes conductive.  It is used to prevent dust accumulating at the legs of high voltage components which may ignite.   I scraped off all the glue on the board, repaired the jumper, replaced the filter cap with a used one from another board, and resoldered the damaged capacitor (tested good on my meter).  I found a 6.2A fuse from another board and plugged it in again.  The fuse blew again but no sparks.

I checked the bridge rectifier with my multimeter and found a short between the + and – output pins.  This was traced to a short on QP801S (600V/10A/N Ch FET).  I temporarily replaced it with a similar FET and the TV finally powered up.  The inrush current limiting resistor NT811S (5 ohm) was also cracked so I replaced it along with all the large electrolytic Samwa capacitors.

Here are the part numbers for Digikey

QP801S – FCPF11N60F-ND 600V 10A N-Channel FET
FP801S  – 507-1215-ND 6.2A/250VAC ceramic fuse
NT811S – 495-4466-ND – ICL resistor 5 ohm 6A

Electrolytic Capacitors

CM851, CM852, CM868 – 680uF/35V
CM856 – 470uF/25V
CM858 – 680uF/25V
CM861 – 3300uF/10V
CB852 – 2200uF/10V