All posts by admin

Artika Subway LED Vanity Light Review

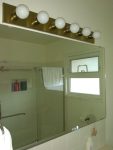
As part of my slow remodel of my main bathroom, the Broadway style vanity light was next to go.  I was down to three out of six globe bulbs and didn’t want to waste money on replacement bulbs.

I had found the Artika Subway LED Vanity Light at Costco last year and it has been replaced this year by a smaller and brighter light from a different manufacturer (Celeste from Innova Lighting, 2700 lumens).   The electrical box in my bathroom is offset from the center of the mirror and vanity  so I needed a light that would cover it and not look odd.

I initially ordered a Mirrea 16W LED vanity light from Amazon.ca but it wasn’t bright enough.  16W is equivalent to a 60W incandescent bulb.

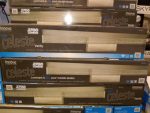
I found the Artika Subway at Costco.com  It is specified to be 1700 lumens which is equivalent to about 110W incandescent.

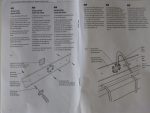
When it arrived, I plugged it in temporarily to check the brightness and it seemed adequate.  The fixture is also glass so a bit heavy.  It came with a 24″ mounting plate where I drilled extra holes to feed the wire from the box which in my situation is offset from the center.  I also drilled extra holes so I could mount directly to the studs instead of using the included hollow wall anchors.

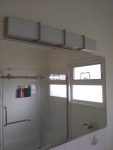
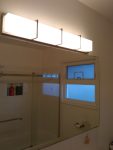
With it installed, it is more than bright enough for a small bathroom and almost covered the old light completely.  If it ever dies, it is going to be a pain to replace the entire unit.

I am finding these lights a bit too bright  (especially late at night) so I am going to replace the wall switch with a dimmer.  The costco.com website indicates these lights are dimmable.

Update: I emailed Artika and they sent me a list of compatible dimmers.  I picked up the Leviton 6674 at Home Depot and they dimmed with no issues.  Here is the list

Leviton Decora 6674|
Leviton Decora 6631-P
Lutron Toggler TGCL-153P
Cooper AAL06
Cooper SAL06P
 

Sony KDL-46EX400 No Power

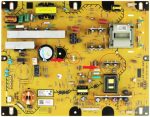
This TV had no front LED and Sony’s tend to have diagnostic blinking codes.  Probing the power supply board connector found STBY3_3V, AC_OFF_DET and POWER_ON signals present but REG12V missing.  The block diagram shows 12V is regulated down to 5V for the main board and processor and no 12V is a power supply board fault.  Training and service manuals can be found here.  Schematics here.

I was looking for points to measure the PFC voltage and stumbled on R6536.  The negative side can be contacted on the jumper FB6501/JS6502.  I measured 394VDC on one side of the resistor and nothing on the other side indicated the resistor was blown.

Searching this resistor designator found similar boards where shorts on Q6101 and Q6102 (2SK4096LS) would cause R6536 (fusible 0.47 ohm 1/2W) to blow.

Replacement parts ordered from Digikey were FDPF8N50NZ-ND (500V, 8A, N-CH, 0.85ohm, TO-220F) and PPC.47BCT-ND (0.47ohm, 1/2W).  T-220F is an insulated package where the FET contacts the heatsink.

After replacement, the TV powered up.  If the fuse blows again, it is recommended to check the components feeding the gate of both mosfets.

Power supply part number is APS-260(CH) 147420511 1-474-205-11

LG 42LB4D Bad Capacitors Power Issues

Got a hold of this TV which had no problems but it’s at the age where capacitors could fail.  Alternate model number is 42LB4DS-UA.

Checking the power supply found a mix of mostly Capxon and some United Chemicon capacitors.  Two small 220uF/25V caps were bulged.  They tested less than half the rated capacitance so the circuit was still working.

I decided to replace all the green Capxon caps.

C207, C218 – 220uF/25V
C202, C204, C205, C227, C234, C235 – 680uf/25V
C208, C209, C210 – 1000uF/35V

TV powered up fine as before but should last a lot longer.

Thermostat Replacement – Two Stage Furnace with W2 Wire

My parents called me since their thermostat was stuck in a 17 deg HOLD mode.  When I looked at it, it did appear to be wonky and pulling out the batteries did not reset it.

Off to Home Depot and I picked up the cheapest Honeywell programmable one at $35.

Removing the old one, the red, white and green wires were connected to the corresponding terminals but there was a black wire connected to W2 and a blue wire tucked in behind unconnected.  Googling W2 indicated this was a second heating stage and I needed a thermostat with more than single stage control.

Back to Home Depot again and I returned with the cheapest Honeywell programmable with two stages for $80.  Checking online afterwards, the cheapest Honeywell two stage is $37 USD on Amazon (RTH6350).  A newer model, the RTH6360 is $49 and features an upgraded interface and a calendar based clock that can automatically adjust for daylight savings.

A little research indicates that single stage furnaces run fully on or off and a second stage adds a lower heat mode which theoretically saves gas and keeps the temperature more consistent.  By default, thermostats are single stage only so you need to check the specs to see if they support the second stage.  Sometimes this is marked as 2H (2 heat)

Two stages may need to be set in the system settings.  My model also allowed me to changed it to single one week programming versus the default 5-1-1 ( separate programs for 5 weekdays, Sat & Sun).

The standard wiring is

Red – 24VAC
White  – Heat control
Green – Fan control
Yellow – Cool control (air conditioning is rare in my locale)
Blue – Common (for thermostats that need power like Nest which is why it was tucked away)
Black – Wired to W2 second stage heat in my scenario

Shark Steam Mop Attempted Repair – No Steam

My mom gave me her Shark steam mop since it wasn’t working.  It was getting hot but no steam was coming out.  Google told me a common problem was mineral or calcium deposits blocking the steam nozzle.  I tried poking at the steam outlet with a straightened paper clip and then with some 14 gauge wire but couldn’t clear it.  Google also suggested running it with a 50/50 mixture of CLR and water but I didn’t have any.

Opening the back cover, I had found the insides rusty and a cracked tube with a spring coming out at the top of the heater.  I disconnected the end of the steam hose that led to the output nozzle and cleared away deposits that blocked a very small 1-2 mm opening for the steam.  It would have been a bit difficult to unblock it with the paper clip from the other side and the 14 gauge wire would have been too big.

When I tried to reassemble it, the hose was brittle and kept on cracking on the ends.  I kept on cutting it and it ended up being too short.  There is a long spring inside the hose is to prevent it from kinking.  I was able to find replacement hose and clamps on ebay (search for 5/16″ or 8mm outside diameter silicone hoses).

Considering the rust, potential deposit buildups inside the heater and the power LED indicator that fell off due to rusted pins, I decided it wasn’t worth repairing.

I will tell her to use distilled water once I find a new replacement machine.


Samsung LN52A630 Won’t Turn On Flashing Front LED

Extended model numbers are LN52A630M1F and LN52A630M1FXZC.

When plugged in the front LED flashes continuously and you can hear a relay click every 30 seconds.

This TV uses power supply board part number BN44-00201A which has capacitor issues.

After replacement of the following parts –

CM851, CM852 – 1000uF/25V
CM854, CM855 – 1000uF/16V

the TV still didn’t power up.

Research on badcaps indicated potential failure of C102 which is a tantalum surface mount capacitor  on the back of main board BN41-00975C (printed on board, also BN41-00975B).  To test, you can solder a 100uF/10V capacitor in parallel with C102 to see if the TV starts up.  Note that tantalum caps have the positive lead marked (vs negative lead on electrolytics).

It can be replaced with part 399-4981-1-ND from Digikey (47uF/10V  1411 surface mount cap).  C131 on the top side almost directly underneath should also be replaced since it is the same as the failed part.

You may also need to replace the IC101 directly beside C102, MP2363DN (Digikey part#1589-1366-ND ).

Sharp LC-60LE644U TV Stuck on Logo Won’t Start

This problem may show up on other Sharp models including  LC-55LE653U, LC-65LE664U, LC-70LE733U, LC-60LE660U and LC-70LE660U.

Though research indicates main board replacement will fix this problem, it would be cheaper and easier to reload the firmware since it appears to be corrupted and stuck during the boot process.

Steps are as follows.

  1. Search for and download the latest firmware from Sharp.  For LC-60LE664U, the file is here.
  2. Extract the .img file from the archive
  3. Plug in and format a USB drive FAT32
  4. Copy the .img file onto the root directory of your USB drive and rename the file install.img
  5. Have your TV unplugged and insert the USB drive into the side USB port and plug the TV in.
  6. The firmware should install.  Once finished, remove the USB drive, unplug the TV and plug it back in.

Toshiba 46XV645U 52XV645U No Power Won’t Turn On

Posts on badcaps.net indicates a common failure with this TV is caused by dirty contacts on a relay and a blown cement fusible resistor.  To diagnose this failure, check all fuses on the power supply board PE0702A and the resistance of the large white rectangular resistor R850 marked RGDU5M-5E (1.8 ohm 2.8W Noble fusible resistor).  The only place I could find an equivalent part was on ebay (search “RGDU5M-5E”). You also need to clean the relay contacts for SR80.  It is a black rectangular part located near R850.  To clean the contacts, remove the plastic cover on the part by grasping up on the sides.  Slide a business card between the contacts and move it around while gently pressing the contacts closed.  After cleaning SR80 and replacing R850, check that the 5V standby is stable by probing the main connector.  If it isn’t, Q880 needs to be replaced.  This part is STRY6456 and can also be found on ebay.  Make sure the pins are straight and not right-angled.   The bridge rectifier (D8820) could also be damaged but this failure is less common.  You may also notice browning around R827 and R828 but these parts tend to be ok.

Update: The equivalent part Ohmite TWW3J2R0E (2.0 ohm, 3W) can be found at Digikey (part# TWW3J2R0E-ND) and Mouser. You can also substitute the 5W version TWW5J2R0E.

Youtube video from Tampatec below on this problem but he doesn’t mention cleaning the relays.

Other models using this power supply board are 46XV648U, 47ZV650U, 52XV648U, 55SV670U and 55ZV655U.
 

Helium Backup Can’t Connect Waiting For Device Problem

I’ve been able to move most of my apps fairly easily when updating Android tablets or smartphones but a couple of King Games have issues.  For Bubble Witch Saga 2 and Candy Crush Soda Saga, you can save your progress by connecting to Facebook but you end up loosing all your boosters.  The only way to keep your boosters is to back up application data with the Helium app.

Connecting with the Helium app has always been tricky.  You have to make sure you have the correct USB drivers.  For my new Asus Z300M tablet, the initial drivers that were found indicated problems with MTP but when I let Windows update search for the latest drivers online, it appeared to find the latest ones.  In device manager, the driver showed no errors but Helium still would not connect and would show “Waiting for Device” .

Under Device Manager, the tablet shows up as “ASUS Android Composite ADB Interface”.

After several attempts at switching between MTP and PTP modes and toggling USB debugging on and off, I decided to try to run adb.exe in command mode to see if my computer could talk to the tablet.

I opened up a command window (Start Menu->Search box->type cmd) and entered “adb devices” at the command prompt.  The PC found the device and a window popped up on my tablet with “Allow USB Debugging?  The computer’s RSA fingerprint is XX:XX:XX:XX:XX:XX:XX”  Once I hit ok, Helium connected successfully.

If your drivers don’t report errors (not listed under the question mark in Device Manager), try this.