All posts by admin

Sanyo FVM3982 No Picture Attempted Repair

I picked up a 39″ Sanyo FVM3982 that had an issue with the picture going out a couple seconds after initally turning on.

After removing the back panel, I checked for bad capacitors but there weren’t any.  When I powered it up again, it started working so I closed it up and left it on for a couple of hours.  The old adage “problems that go away by themselves come back by themselves” applied here and the next time I tried to turn it on, the problem came back.

Trying to identify the symptom better, it appeared that the backlight was shutting off.  This was confirmed by shining a flashlight on the screen to see if the screen image was visible.

I wanted to get a look at the inverter boards which power the backlight but for this model of TV, it would involve taking apart the panel which is held in a steel frame with a bezel that holds the thin and fragile LCD panel in place.

The LCD panel is enclosed by the steel frame.  On this TV, there was no internal plastic frame to keep the panel in place.

When I reassembled the bezel, I ended up cracking the perfectly good LCD panel since it wasn’t perfectly centered and my power drill overtightened the screws.  I should have been more careful and only tightened the screws by hand.  Leaving the TV on while assembling the front bezel would also give me visual confirmation I wasn’t over-tightening the screws.

Update:  Research after the fact indicates the power supply board typically has protection circuitry that shuts off the backlight if a problem is detected.  Burnt out CCFL bulbs or bad transformers are typical culprits in this case.  A burnt out bulb can be bypassed by removing and shorting the associated transformer with only a slight degradation to the backlight brightness.  With this TV, the inverter board was suspect since the backlight did work intermittently.  A replacement  inverter board was about $14 USD.

Sanyo
Working Sanyo FVM3982

Repairing My Chimney Cap

When I bought my house almost 20 years ago, they had previously installed a gas fireplace in the basement and did a sloppy job on the exhaust pipe which ran up the chimney.  The cap had been removed and the second flue had been exposed.  Only recently did I decide to fix this with a new chimney pot.  I found a masonry supply store nearby, I-XL Masonry, and brought them measurements and pictures to get the correct size of a chimney pot.  I also picked up a small bag of brick mortar at Home Depot in the US.  I could only find large bags in Canada.  Research online indicated I should be casting a chimney crown with a drip edge but this would be too much work.  I would just use the brick mortar to build a small slope on the top edge for rain water to run down.  The first step was to take down the bricks and they came down fairly easy with a small tap of a hammer.  Once I cleaned out all the old mortar leaving a level surface, I installed the new chimney pot.  I also had some scrap metal screen that I used to cover the flue to keep animals out.  I then applied mortar to put a sloped edge along the brick.  I did have to go back on the roof a couple of weeks later since I could hear clanging from the chimney on windy days.  The cap on the new pot wasn’t sitting completely flush and would rock.  I remedied that problem with a little bit more mortar to fill up the space and eliminate the movement.

Bad capacitors in electronics including TV’s

When my Tivo died after many wears of use, I decided to research online to see if there was a fix and came upon the problem of capacitor plague.  Electrolytic capacitors used predominantly on power supply boards in electronics have a high failure rate making this 10 cent part responsible for junking a high priced piece of equipment.  There are websites devoted to this problem like badcaps.net and a class action lawsuit in the US against Samsung for TV failures in 2012.

With typical electronics failures, repair and troubleshooting require knowledge of how the circuit operates and test equipment including multimeters and oscilloscopes.  However, with electrolytic capacitor failures, very little debugging is required since failed capacitors “pop” and bulge on the top making it simple to identify and replace.  With a little bit of soldering and the replacement parts, it is easy to repair this type of failure.

Replacement capacitors in small quantities can be found on ebay.  Some sellers will bundle capacitor kits for your model of TV (at a premium).  Asian sellers have small quantities on ebay available for a couple of bucks though I find shipping takes anywhere from 2 to 8 weeks.  In Vancouver, you can find small quantity capacitors at Lee’s Electronics or Main Electronics.  RP Electronics may carry them as well but I haven’t shopped there recently.  Digikey delivers to Canada and the US overnight but they have a $8 shipping charge for orders under $200.

When finding replacement caps, look for the brands Rubycon, Nichicon, Samxon and Panasonic.  The value (typically in uF) is what you need to match as well as the voltage rating.  You can use a higher voltage than you currently have (which may also decrease the chance of a future failure) but the uF needs to match exactly.  There are also two case styles: radial (most common) and axial (connections on both ends like a car axle).

When installing capacitors, make note of the polarity.  The negative terminal is typically marked on the board and also on the capacitor with a vertical stripe.  An electrolytic capacitor installed backwards will not work.

Soldering Tips

Get your soldering iron hot and clean it with a damp (not wet), dense sponge.  Clean the tip again once it gets dirty with burnt flux or if there is too much solder.   Apply a tiny bit of solder to the tip since a “wet” tip will improve heat transfer.  Touch the tip to the joint and add more solder to the joint once it gets hot enough.  Use the heat of the joint to melt the solder and NOT the iron tip.  This will ensure a good connection.  Areas with large ground planes may take a bit longer to heat up but be careful not to apply too much heat since this could lift up and damage the pad.  A good solder joint has the solder evenly flowed around it and is not balled up.  Solder may contain flux which is an acid that cleans the area to ensure good adhesion.  You can also buy flux pens if a small amount is needed.  Once the joint is cooled, you can clean the dirt left by the flux with a qtip dipped in rubbing alcohol.  Wash your hands after soldering since solder may contain lead.  Eye protection is also important since solder could flick into your eyes, especially when soldering wires.

To remove an electrolytic cap, apply excess solder to the two joints and then alternate your iron back and forth between the two while gently tugging at the body of the cap.  Once the capacitor is out, remove the excess solder with desoldering wick.

Repair a dropped remote control

My parents gave me their remote that wasn’t working after the grandkids dropped it on the hardwood floor.  Taking it apart and checking for broken connections, everything was intact.  A little research online indicated the 455khz ceramic resonators used for timing are susceptible to shock and was a likely culprit for drop damage.  I checked the local electronics stores but they didn’t carry the part so I ordered 5 pieces on ebay from Asia for $1 (includes shipping).  Getting impatient, I then decided to head to the recycling center and ended up finding an older but brand new remote for a camcorder that I was able to salvage the resonator from.  The replaced resonator fixed the remote and the resonators I ordered eventually did arrived 8 weeks later.

A good way to help debug problems with remotes is to use a digital camera (smartphone or tablet works as well) to view the pulses coming from the IR LED to confirm your remote is working.  Another technique is to use an analog multimeter to see the pulses while probing the voltage at the LED if you don’t have an oscilloscope.

For maintenance, I regularly take remotes apart to clean them since they collect a lot of gunk from sticky fingers.  The circuit board gets cleaned with rubbing alcohol while the the plastic case and rubber keypad gets a bath is hot soapy water.  Dry it completely before reassembling.  Don’t wash the circuit board!!

Replace your mail slot

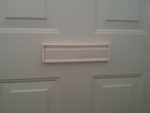
You wouldn’t think it would be difficult to find an insulated mail slot.  When I had my front doors replaced many years ago, I had one installed for around $40 and bought a second one for my parent’s house.

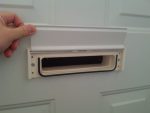
Over the years, the front hinge had partially broken (damn kids) and the brass colour was looking dated.  I had reversed the slot to put the broken piece on the inside of the house.  Searching online, I did find one model but it was a whopping $47 USD plus shipping.

Checking big box stores, they only carry uninsulated metal mail slots that get super drafty and wet with condensation in the winter months.

I eventually found a replacement on ebay (search “upvc letter box”) for only $14 USD including shipping from the UK.  The doors flip 180 degrees to minimize potential breakage from being overextended.

Exchange an expired propane tank

My propane tank expired last year and I figured I might need to buy a new one at a store with tank exchange so I wouldn’t need to buy a new tank next time.  I always assumed with tank exchange, you needed to first purchase their brand of tank.

The manufacture date on a propane tank is  usually stamped with xx-yy with xx for the month and yy for the year.  In Canada, tanks can’t be refilled after the expiry date unless they are re-certified.  Re-certification only extends the life a few more years and costs nearly the same as a new tank so it’s generally not worth it.

Research online indicated that in the US, the expiry for tanks is 12 years so I figured I could take my tank across the border to get it refilled.  Propane stations are becoming more difficult to find and I found that Uhaul and WFC Coop both on Meridian St in Bellingham had propane filling stations.

When I took the tank to WFC, the attendant indicated they could not fill older tanks without an OPD (overfill protection device) valve with a triangular shaped handle.  He indicated they filled by volume in the US while in Canada, propane is sold by weight so non-OPD tanks are a bit more common.  He suggested taking the tank to a nearby supermarket where they could exchange my tank for a newer one.

I enquired at the supermarket which was using Blue Rhino and they indicate they would exchange any tank but not older ones.  Propane exchanges were around $18-$20 USD with Blue Rhino.  I decided I needed to do more research.  I emailed Blue Rhino when I got home and they replied they accept non-OPD tanks though there may be a surcharge.  I checked Amerigas’s website (used by Home Depot in the US) and it indicated non-OPD tanks could be accepted for exchange.

In Canada, Home Depot uses PNEpropane so I emailed them asking if they would exchange an expired tank.  They replied indicating they would.  I also dropped by Walmart who use Tanktraders and the sign on the cage indicated any tank was exchangeable but it had to be less than 10 yrs old.

I ended up exchanging my expired tank at Home Depot for $28 CAD + tax with for a filled OPD tank.  I noticed they had non-OPD tanks as well.  I will probably refill it until it gets older and then exchange again.  Exchange tanks are typically underfilled so refilling is typically a better deal.

The attendant commented my tank still seemed full when I exchanged it and I had thought it was empty since the flame was low.  I had recently bought a new bbq and the new tank had low flame after awhile as well.  It turns out the regulator needed to be reset following the instructions here.  I guess my original  tank could have lasted another year.

IMG_20151015_122019
Tank exchange at Walmart Canada

Windows 10 Privacy Settings

With the free upgrade and glowing reviews of Windows 10, I decided to update my home theatre PC (HTPC) computer.  This PC had a tricky setup since I am running with a single 3TB hard drive which requires a motherboard with UEFI compatible BIOS to boot with this large of a drive.

One of the major criticisms of Windows 10 is the loss of privacy and that using the express settings collects and sends data to Microsoft.  There are a few websites that go through these settings and indicate how they should be set to protect your privacy.  Here is one.

After running Windows 10 for a few days, I was getting annoying blue screen errors probably caused by driver conflicts.  I decided it was easier just to rollback to Windows 7 since you could do this within a month of the free upgrade.

I then found that some of the privacy intrusions introduced in Windows 10 were being added to Windows 7 and 8.1 through Windows Update.  Luckily, these updates could be uninstalled.  One article here.  Updates that should be uninstalled include KB3075249, KB3080149, KB3068708/KB3022395.


Painting siding with Behr Ultra Premium Plus

My house is mainly stucco with wood siding for the lower front and side of my house.  The siding was in rough shape and in desperate need of new paint and repairs.  Most of the damage was occurring at the outside corners.  I was able to buy siding at the lumber yard (Sunbury Cedar) for the repair work and 4ft pieces are relatively inexpensive versus longer pieces.  They have a rough and smooth side.  Sunbury Cedar also sells bulk outdoor nails and screws which is typically not available at big box hardware store.  Dick’s Lumber also has bulk fasteners including gold construction screws, drywall screws and roofing nails.    The hardest part in repairing siding is to not damage the piece above the one you are removing since they overlap.  Though you may split the piece, it can be glued and nailed back fairly easily.  For the main part of my house, there is felt paper underneath the siding as a water barrier so you need to be careful you don’t rip it.  The siding which acts as a rail on my deck was also heavily damaged in the corner rotting the wood underneath it and water was getting into my addition.  There was no felt underneath it, just the bare studs.  I was able to find some scrap house wrap at a construction site to put behind the siding in the corner.

With the siding patched, the next step was to scrape away any loose paint and caulk any seams in the siding where water could get in.  I used DAP Dynaflex 230 premium caulk which is recommended for outdoor use.  I also had the cheaper Apex caulk which I typically use for indoor moldings.  Though it is rated for outdoors as well, it has poor reviews when used outside.

Before painting, I cleaned the surfaces with a TSP substitute solution and rinsed the siding with a hose.  Though I have a pressure washer, I didn’t want high pressure water getting into the nooks and crannies of the siding.

After allowing a day or two to dry out completely, I painted with Behr Ultra Premius Plus in satin sheen.  Behr is exclusive to Home Depot and actually very highly rated.

The Behr paint is excellent and covers in one coat easily.  I only used a brush since the area was relatively small.  You do have to touch up areas where the paint may shrink a bit and areas you might have missed.  The paint makes the wood feel like vinyl siding after it dries.  I was only going to do the front and balcony with the one gallon I purchased, but decide to do the side of the addition and shed which ended up being another 2 gallons.

Replace your bright brass door knobs

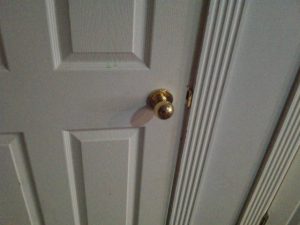
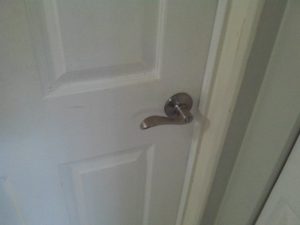
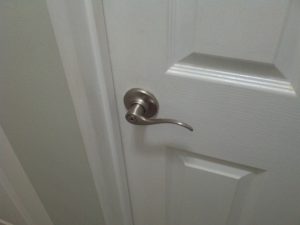
One day it dawned on me my bright brass door knobs were really dated and it would be a relatively inexpensive reno to change them out along with the door hinges.  Indoor non-keyed knobs have two styles – passage (non-locking) and privacy (locking for bedrooms and bathrooms).  I tested a satin nickel privacy knob from Lowes but thought the knob was a bit small and thought a lever would be a better choice.  I’ve heard that the city of Vancouver building code requires lever knobs because of the aging population.  I purchased Defiant privacy levers from Home Depot in the US for all of the bedrooms.  They have a hefty lever, are reversible for left or right swing, and the latch can fit either a drilled hole or mortised latch.  The downside was they are a bit too easy to open when locked from the outside.  The slot  on the front can be turned with a finger.  Because of that, I bought a Kwikset lever for the bathroom.  It has a small hole in the front than will need a small screwdriver to open.

I purchased matching satin nickel door hinges from Dick’s Lumber.  They were actually cheaper than Home Depot and included screws.


Repairing a collapsed downspout pipe

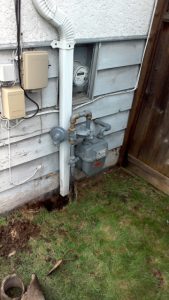
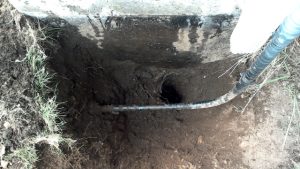
While mowing my lawn one day, I hit my concrete downspout pipe and notice that it had completely collapsed.  As I investigated by digging with a hand trowel, there wasn’t much of the pipe left and it was completely clogged with dirt.  A little unsure of how to proceed, I contemplated renting a power auger to try to clear the pipe.  This wouldn’t be a great solution since the pipe still needed to be replaced.  I could potentially slide a narrower pipe inside of the broken concrete one.  I checked the depth of another pipe on the same side of the house and determined I would need to go down 3-4 feet to hit the drain tile.  This could potentially open up a whole can of worms.  The gas line was also right there so I had to be careful.

I decided to continue to hand dig but also use my power washer and shop-vac to try to unclog the dirt from the broken pipe.  This combo actually worked pretty well.  I eventually hit something reddish in color thinking it was clay pipe.  It ended up being an orange plastic hockey puck which had probably been down there for 20 years.  Good thing I didn’t rent the auger.

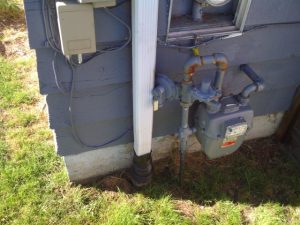
With the path finally cleared, I needed to replace the pipe.  Having to choose between PVC and ABS, ABS was cheaper but not to be used outdoors since it degraded with sunlight.  I checked Lowes and found some inexpensive, corrugated drain pipe and fittings to adapt to both ends including one for the rectangular downspout.  It was surprising Home Depot didn’t carry this product.  The repair was finally completed after realigning the downspout and moving some utilities around.  I also took the opportunity to clear leaves and needles that were blocking the gutter.