All posts by admin

Samsung LNT4061FX LNT4661FX Won’t Turn On and Colour Issues

This series of Samsung TV’s has both capacitor issues and tcon failures.  Bad capacitors will cause the TV to not turn on or turn on with difficulties or have pink dots on the screen.  Tcon failures caused by a failed AS15F gamma reference IC will cause colour problems or a whitewashed image.

Capacitor values for these two models are as follows.  Capacitors need to be low ESR.  Panasonic FC, FM or FR series or Rubycon PX series are good replacements.

LNT4061  LNT4061F LNT4061FX Power Supply Board BN44-00167A
CM807, CM808 – 1000uF/25V
CS806, CM817, CM811, CM812 – 1000uF/10V
CM809 – 220uF/25V

LNT4042 LNT4042H

LNT4661 LNT4661F LNT4661FX Power Supply Board BN44-00168A
CM802, CM803, CM807, CM808 – 1000uF/25V
CM812, CM813, CS804 – 1000uF/10V
CM804, CM814, CM809 – 47uF/50V

Power Supply Board BN44-000166B BN44-00165A
CM852, CM853 – 2200uF/10V
CM876, CM880 – 1000uF/25V
CM850 – 1000uF/10V

To check your tcon board, there should be test points for the gamma reference points.  The voltages should increase or decrease steadily with no big jumps or outliers.

Sony KDL-40Z4100 14 Blinks

Most of the problems reported with this model of TV is failure of the AS15F chip on the Tcon board which causes a white washed image, solarization or color issues.  Fourteen blinks was a possible tcon failure but I couldn’t verify with any manuals online.

Checking the fuse on the tcon board showed it was fine but when I measured the voltage, it was only measuring 1.9VDC when I was expecting 12V.  This supply is passed through pins 47-50 of the LVDS connector.   I was able to find a service manual online.  It didn’t contain the diagnostic codes but there was a schematic of the main board.  12V is generated from the power supply board and sent to pin 7 of CN1401 on main board (REG12V).  The signal passes through a FET switch (Q1423) and fuse (F1422) and sent to the Tcon board through the LVDS cable.

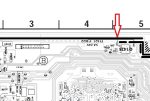
Checking F1422 (24V, 5A, 0402), it was open and I replaced it with Digikey part  P121391CT-ND (32V, 5A, 0402).  F1422 can be found on the back side of the board almost directly opposite the LVDS connector and to the left on the edge.

With the fuse replaced, 12V was present on the Tcon board and the TV started up.  However, the screen was whitewashed so I have to replace the AS15F chip as well.

Update: After a couple of months, I got my AS15F chips in the mail from China and was able to replace them on the tcon board.


Instant Bonding with Crazy Glue

Watching This Old House, they showed a method for joining wood trim using a two part adhesive that bonded instantly within seconds.  Glue was applied to one side while an accelerator was sprayed on the other.  Researching online, I found the product is just cyanoacrylate (CA) commonly known by the brand name Crazy Glue used with an accelerator.  CA accelerator has several brands including Zip Kicker, Instant Bond and Insta-set.  Since it bonds almost instantly, it is stronger and there is no waiting for the product to dry.

I have been buying crazy glue at the dollar store since you can get mini tubes and don’t need to waste as much when the whole tube dries out.  There are some videos on youtube where baking soda is used as an accelerator as well.  Here is an article with the Mythbusters about it.

Zip Kicker can be found at hobby shops (popular with model builders) and online.  I’ll have to try it out next time I break something.

Samsung LN46D550 Won’t Turn On

Other model numbers include LN46D550K1F and LN46D550K1FXZC

This TV went through the motions of turning on but didn’t.  The front led flashes and then goes out with no picture and no backlight.  BLU_ON and PS_ON signals were being sent from the main board.  I put alligator clips across the large caps to check the PFC voltage and it peaked at 430VDC when the TV  is first plugged in before dropping to an off-state of 165VDC.  I suspected an overvoltage condition was occurring causing a shutdown.

I couldn’t find a schematic for the power supply board BN44-00441A.  The closest I could find was for BN44-00341B.  Shopjimmy has a repair kit for the board which included ICP801 which is the PFC controller.  I couldn’t read the markings for this part and figured it out it must be a FAN7930B since pin 2 was being used as an OVP detection line.  The part is available at Digikey part# FAN7930BMX-GCT-ND

It was a little difficult to remove the part probably because it may have been glued underneath.  After replacement, the TV turned on and the PFC voltage was stable at around 395VDC.

Because the power supply had crappy Samwa capacitors, I proactively replaced these as well.

CM809, CM811  – 680uF/25V
CM818 – 2200uF/10V
CM825 – 470uF/10V


Wecast Wireless Display Dongle from Ebay Review

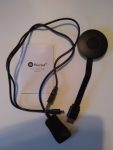
I purchased this Chromecast knockoff dongle on ebay for $13 USD.  This device lets you mirror your smartphone or tablet screen to your TV through the HDMI port.  Though there are English instructions, they are difficult to follow.

The dongle sets itself up as a wireless access point initially so you can connect to it and give it the wireless settings for your home network.

Here are the steps –

To Setup:
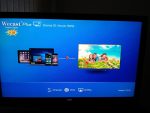
1. Plug in the dongle into your hdmi port.  The dongle needs power from a USB port either from your TV or external adapter.  The screen should show the Device ID, Password and IP address. If this screen shows up again, it means the dongle has lost connection to your home network and you will need to reconnect following step 2 & 3.
2. On your tablet, go to your wifi options and search for the Wecast network shown in the Device ID. Connect using the default password 12345678
3. Open a browser and enter the IP address from the home screen. You now need to give the dongle the network settings of your home network under the Wireless AP option.  Once the dongle connects, the home screen will show just the device ID and no password or IP address.  This screen indicates the dongle is connected to your wifi.
4. On your tablet, go to your wifi settings and reconnect to your home network. Using the quick menu, select Play To and find the wecast device. If there is no Play To button, you will need to add it. If it doesn’t connect, try again. If the home menu displays the password, it has lost connection to your network and you will need to repeat from step 2.  If you tried a few times and it still doesn’t work, unplug and then plug the usb on the dongle to reset it.

With my Asus Z300M tablet, I can play 1080P video smoothly with video files from storage using the default video player.  VLC seems to have problems with this setup.

I can’t play any streaming video online like youtube.  I believe it is too much work for my tablet and wifi to simultaneously stream video and output it to the dongle.

The dongle does try to update the firmware on it’s own but fails.  The wifi signal may be weaker than it needs.  I am hoping it will update and maybe connect more reliably.

You should be able to mirror with a direct wifi connection but I had more trouble connecting with a direct connection.

Fix for com.process.media has stopped working

My Asus Zenpad Z300M had been giving me problems the last couple of months after a system update.  I would get  com.process.media has stopped working errors on reboot, gmail and the play store would crash constantly, downloads and screenshots would fail, updates were always pending and I would get low storage error messages.  I had to delete apps to gain space though I have plenty of storage.

After waiting for a new system update that never came, I was close to doing a factory reset.  I then figured out that the system media storage app was using over 7GB of storage.  To clear it, go to Settings->Apps and click on the 3 vertical dots in the upper right corner (more options) and select Show System.  Scroll down and select Media Storage and then Clear Data.  You can clear the cache as well.


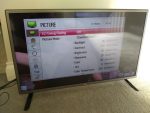
LG 32LB5600 No Backlight – Has Sound but No Picture

With most LED TV’s, no backlight is usually caused by failed LED modules.  Because they are wired in series like Christmas lights, it only takes one failed LED to take down the entire backlight.

I got this TV and the owner indicated there was sound but no picture and he could see moving images using the flashlight test.

When I probed voltages on the boards, all voltages were present and the backlight on and power supply on signals were being sent from the main board.  Voltage was also sent to the backlight strips.   I didn’t have a LED tester so I gambled and ordered a full set of three replacement strips from an ebay seller in China.  Part numbers are 69161L-1974A and 69161L-1975A .  They were sent tracked epacket and arrived in just under 2 weeks.

Taking apart the TV, I broke off one of the standoffs holding up the panel and had to epoxy it back.  Though the pieces slide in,  it probably is safer pushing the clips or body than the standoff.

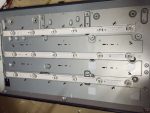
The old strips are double-side taped to the chassis.  I pried them off with a scraper but popped off almost every lens.  I also couldn’t figure out how the connector inserted so broke each one to remove it.  Good thing I was replacing all of them.

When reconnecting the strips, I realized the connectors were pushed down from the TOP and not inserted from the side which I was expecting.

Before assembling the entire TV, I tested the backlight with everything connected except the LCD panel and the backlights came on.  I could then finish reassembling the TV.

Make sure you set your backlight levels lower to increase the life span of the LEDs.

Update: I ordered a LED tester and found two of the three strips had burnt out LEDs.

Convert Heath Zenith Motion Sensor Lantern to Regular Light

I’ve had decorative motion exterior lights for awhile and currently on my second set of three.  The second out of three just stopped working and I wanted to wait until the third one dies before replacing all of them.  I had installed switch protectors on the light switches.  See here.

To convert to a normal light, you need to access the wires going directly to the bulb socket.  You need to remove the control module to get access to the wires.  The module is held inside the fixture by two hollow rivets where the screws slide through to mount the light.  You just need to drill the tops out and you can pull the rivet and release the assembly.

There are four wires coming from the socket section – a multiwire control from the sensor, black wire (hot from bulb), white wire (neutral from bulb) and bare copper ground.  I cut the control wire and all wires from the module and connected directly to the black and white.  I then replaced the control module and rivets.

Remounting the light will give you a normal light.  I should have done this to the first one that failed instead of throwing it out and replacing with a basic jelly jar light.

Some Heath-Zenith models have a recall so check the model number before throwing it out.

Acura RSX Upgrade Light Bulbs to LED

My latest project is to upgrade my interior and exterior lights to LED for my 2002 model vehicle.  LED bulbs are fairly inexpensive on ebay, especially shipped from China.

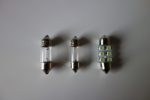
With LED bulbs, you can get a bright white light and you  won’t have a dead battery the next day if you leave your dome light on.   There are two styles of LED bulbs – one made with modules and COB (chip on board) where the lighting element is directly mounted onto the board.  COB should be theoretically more reliable with less solder connections.

Here is a listing of the bulbs for 2002-2003 Acura RSX from my research –

Interior

Map light (x2) – DE3175
Dome light –  DE3175
Glove box light – DE3021 (DE3175 will fit if it’s narrow)
Trunk light – 168
Cup holder light – T5 mini
High mount stop light – 7440

Exterior (not including headlights)

License plate – 168
Front side marker (x2) – 168 AMBER – these are visible so get nice looking ones
Front turn signal (x2) – 7440
Rear turn signal (x2) – 7440
Rear side marker (x2) – 168
Rear tailight/brake (x4) – 7443 (incandescent bulbs are dual filament with 4 leads and 2 levels of brightness)
Backup (x2) – 7440

Most of the interior bulbs can be accessed by popping off the plastic lens cover with a narrow flat blade.  Exterior bulbs are typically removed by turning the holder 1/4 turn counter clockwise.  LED bulbs have polarity so flip them around if they don’t light up.

DE3175  LED bulbs can be quite wide to provide the surface area for the module.  Be careful when choosing from the many different versions.

Update 1: My DE3175’s arrived and were fairly easy to install.  I used a 1″ scraper to pop off the covers.  The bulbs I bought fit the glove box light as well.  To access this bulb, it is easier to pop the glove box stoppers out from the sides.  Empty the glove box  and push the stopper from the outside towards the inside and it should pop out.  The glove box can now flip all the way down and out of the way.  You now have better access to replace the bulb.  Note that the sidelights need to be turned on for the glove box light to come on.

Update 2: My 168 bulbs came in.  I ordered COB LED rated at 80 lumens and 1W.  The old incandescent bulbs are marked 5W which convert to 75 lumens so the LEDs should be slightly brighter.  194 bulbs are 3.8W for incandescent and compatible with the LED version.

Update 3: My 7440/7443 COB LED bulbs came in.  They are very bright.  For the turn signals, the lower power is causing the flasher to hyperblink (blink fast) which usually happens if you have a burnt out bulb.  I have ordered a new flasher module that is LED compatible in order to use the LED bulbs.

For the tail/brake lights, the bulbs are not making good contact on the low side but work ok on the high (brake) side.  The wires on the LED are a bit thinner than the incandescent bulbs  and I need to figure out where contact is being lost.

Update 4: The T5 mini’s came in for the cup holder.  Pry the assembly out with a small screwdriver and twist the holder to access the bulb.  It will pull straight out.    The LED replacements  are a bit long and the lens is a narrow slit so the light doesn’t hit it properly.  There isn’t much light coming from the cup holder so I put the incandescent bulb back in.

Acura RSX Water in Trunk and Wet Rear Seats – Replace Tailight Gasket

After some subzero temperatures and heavy rain, I noticed my interior was very humid which lead to finding my rear seats wet and about 2 inches of water in my spare trunk wheel well.  Google indicated my tailight gaskets were probably leaking.  I vacuumed out about 8L of water.  There is a foam pad from the rear seats that goes inside the well which ended up wicking the water up to the seats.

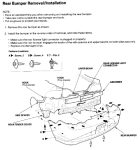
If found a guide here and dug out my service manual on how to remove the bumper.  Looked pretty straightforward so I decided to attempt to replace them myself.

Acuraoemparts wanted $10 USD each and $5 shipping to the US.  Part number is 33502-S6M-A11  The dealer charged $21 CAD so I bit the bullet since I needed them changed out before it was going to rain again.  I had to phone around to find a dealer that had 2 pieces in stock.

The service manual indicates you should have a helper to remove the bumper but I found that I didn’t need  one.  The bumper is fairly light and I put a milk crate under the bumper to rest it while detaching the license plate light.

The bumper is held by 3 philips screws on each side by the rear wheels.  One is hidden and pointing up.  I had one extra screw on each side from the mudflaps.  The entire mudflap doesn’t need to be removed, only the two screws attached to the bumper.  It was a little difficult to remove these since the tire was in the way.  Even a stubby screwdriver was too long so I ended up using the philips stubby bit and a wrench.

There are pop up retaining clips under the bumper.  I broke one removing it and the second one was already missing.  I am going to order some ebay since they are much cheaper.  Part is 91503-SZ3-00

With all the screws and retaining clips removed, the bumper snaps out fairly easily.  The license plate light assembly is attached to the bumper with clips so I used a flat blade screw driver to release the clip and free it.  I could then set the bumper out of the way.

With the bumper removed you can access the two screws holding each tailight assembly from the bottom.  I popped off the center interior panel easily to get better access and unscrewed all the bulbs.  Four 8mm nuts held the assembly in place and were put on fairly tight by the factory.  I made sure I had them tight when I reassembled.

With the tailight removed, parts of the old gasket remained due to double sided tape in four spots.  I scraped all these off to get a good seal with the new gasket.

Putting everything back together was straightforward as well.   Make sure you install the bottom tailight screws before putting the bumper back on.

My service manual is for a 2002-2003 RSX though 2004-2006 should be similar.

Update 1: After replacement, I am still getting wet rear seats and a bit of water in the trunk wheel well.  I think I have clogged moonroof drains.

Update 2: My mechanic indicated my moonroof drains were not blocked and suspected the weatherstripping around the hatch.  I ordered the part#74440-S6M-003 from acurapartswarehouse.com  The service manual indicates it is just pushed in so it should be relatively easy to replace.  There should be an alignment mark at top center of the weatherstripping.

Update 3:  The weatherstrip arrived.  Fairly easy to install though a rubber mallet might have helped.  It was a bit tricky to get the weatherstrip over the rear hatch panel and the headliner.  There is a painted alignment mark on the weatherstrip and the service manual indicated to align it with the center of the hatch.  I assumed it meant top center.