All posts by admin

Toshiba 58L1350UC No Power

Model 58L1350U – C suffix for Canadian model.

Got this TV in with report of no backlight. I tried probing the LED connector from the back but couldn’t figure out the wiring. Taking off the panel, all the backlights tested good so I put the panel back. The TV appeared dead and did not power on. A post on badcaps indicated to check Q301 for shorts. Q301 was shorted drain to source and measured about 400 ohm both gate to drain and gate to source. Part number was FQPF16N25C (N-CH, 250V, 16A, TO-220F). The main fuse was not blown. I replaced this part and the TV powered up. The standby light was not on but this may be set in the menu. I checked the backlight level after doing a reset and the default for standard mode is 5 out of max 50.

Samsung LN46D630 No Backlight

Model: LN46D630 LN46D630M3F LN46D630M3FXZC

This TV would turn on and off with chimes but no backlight. Power supply is BN44-00463A. The PFC circuit generating 390VDC is suspect if the backlights don’t come on. I put alligator clips on the big capacitors and they were only reaching about 250VDC when the tv turned on before it shut down.

The usual suspects in this circuit are DP810, CI818, CP820, ICP801, CM809 and CM811. Electrolytic capacitors CM809 and CM811 were not bulged. I tested DP810 in circuit with my multimeter in diode mode. It measured open in one direction and 0.5V dropin the other so it was good. CI818 tested good in circuit with my multimeter in capacitance mode. CP820 didn’t test good and when I pulled it out, it tested as a resistor in my ESR meter. Value is 220pf/1KV and 2KV or 3KV can be substituted. With CP820 replaced, the backlights came on. If CP820 was not the fault, I would have replaced ICP801 which a FAN7930B IC.

Samsung LN46C630 No Backlight

Model LN46C630 L46C630K1F LN46C630K1FXZC

This TV would turn on but without a backlight. Power supply part number is BN44-00341B. Posts on badcaps indicate film capacitor CI818 is suspect. I removed it and it tested bad. I ordered a replacement 0.47uF / 630V (PCF1574-ND Digikey) and the TV was fixed after replacement.

RSX O2 Sensor Part Numbers

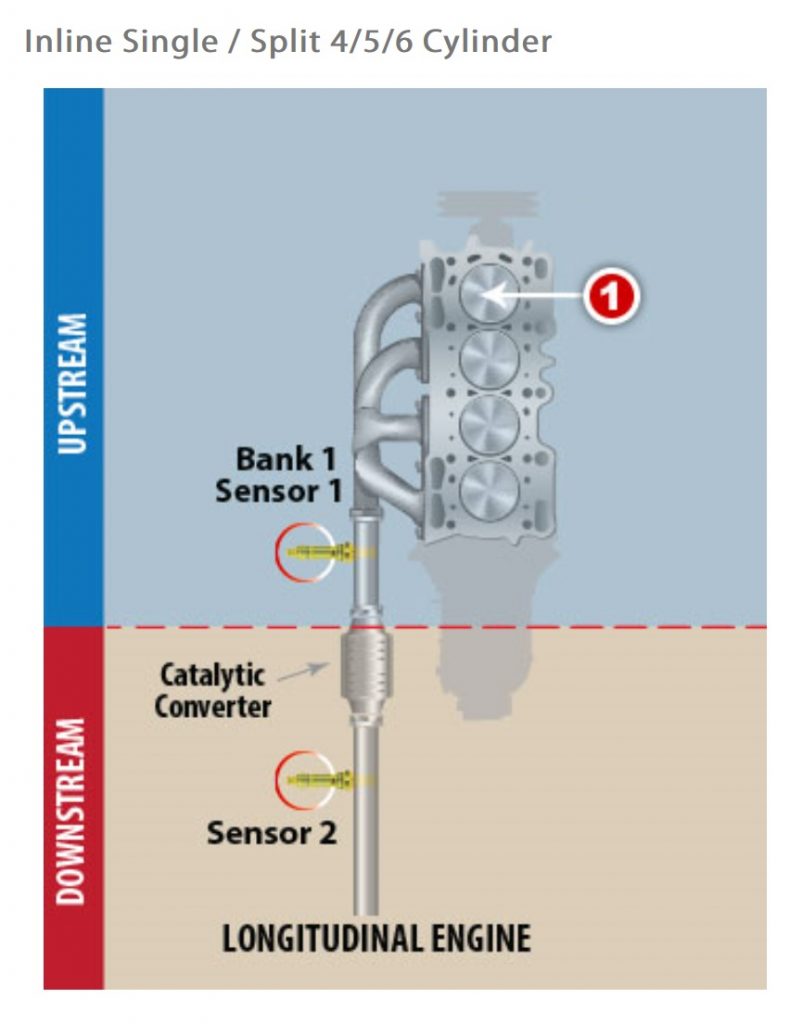
My friend’s RSX was getting OBD codes P0137 , P0138 and P0139. All three codes are for the O2 sensor (Bank 1, Sensor 2) but there are two sensors for the RSX. It is a bit confusing to determine which sensor needs to be replaced and which sensor is upstream or downstream.

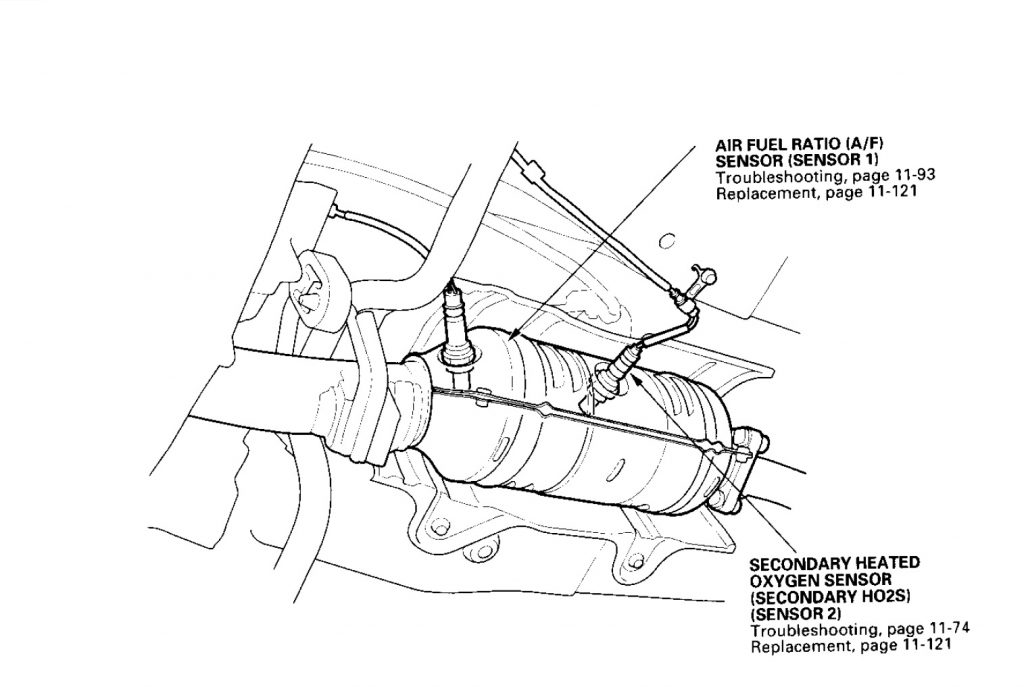
This webpage from Denso explains the banks and sensors. Click the Performance tab. With a straight four engine, there is only one bank on the RSX. Sensor 1 is upstream and located before the catalytic converter and also called the Air Fuel Ratio Sensor. Sensor 2 is downstream and after the catalytic converter.

Honda OEM sensors are made by Denso so it would be cheaper to get a Denso sensor. Searching the part number on Denso yields the following part numbers.

234-9004 upstream sensor (non Type S, manual) – Acura part 36531-PND-A01
234-4122 downstream sensor (non Type S) – Acura part 36532-PND-A01

You can find these parts on Amazon both US and Canada.

The service manual describes sensor 1 as primary and sensor 2 as secondary.

RSX O2 Sensor Locations from Service Manual
Sensor Descriptions from Denso

RSX Blower Not Working

My friend’s RSX blower wasn’t working so he brought it by for me to help him debug it. The fuses appeared good and once in a while it would start up for a few seconds. Searching youtube, I found the following video which points to the culprit as a thermal cutoff.

The video links to this webpage with instructions on replacing the thermal fuse in the power transistor module.

Measuring the resistance across the fuse indicated it had opened. Checking the cabin filters, they were very dirty and would have caused the overheating in the module with the airflow restricted. The service manual recommends replacing the cabin filters every 2 years or 48000km.

The part number for the module is 79330S6M941 and it can be found on ebay for around $15 USD.

The Digikey part referenced in the link to replace the thermal fuse is obsolete and no longer available. Digikey part 317-1134-ND appears to be a close substitute and available if you want to just replace the thermal fuse. The leads are a bit thicker and won’t fit through the old holes so you need to bend it inside the pcb to make contact with the top of the circuit board.

Samsung UN55FH6030F No Video

Model UN55FH6030 UN55FH6030F UN55FH6030FXZC

I had previously encountered this model with failed backlights. This TV had different symptoms and the backlights were working but with no video. The usual suspect when there is backlight and sound but no video is the tcon board. The TV appeared previously repaired since the main board was from the 65″ version of the this TV. I still had the other TV so tested the 65″ main board on it and it was working fine. I couldn’t swap tcon boards since the panels were different even though it was the same model.

Searching the tcon part number BN96-27249A found repair kits indicating it had a common fault. Used boards were actually cheaper than the repair kit and only $12 USD from Electroparts online.

The replacement tcon worked and fixed the TV.

The backlights appeared good. I checked the backlight setting and it was in standard mode with a default level of 12/20 on all inputs. Though not the problem in this tv, It does appear running the backlights at 100% is what causes failure.

Vizio M43-C1 No Backlight

This TV responded to the power button and attempted to turn on but there was no backlight. Checking the signals at the power connector, I measured 19V at the 12V pins and 3.6V at the PS-ON pin but BL-ON wasn’t getting a signal so the main board was suspect.

Checking shopjimmy, they sell an eeprom for the main board with the symptom no backlights. They have a video showing the symptom on a similar model P502UI-B1

Ordered the eeprom but the problem was still there. Luckily, new main boards were available for $30 USD from Electroparts online through their ebay store. I have had a good experience from Electroparts since they had free returns and provided USPS labels.

After main board replacement, the TV turned on with backlight. There were also LEDs on the main board that lit up. A post on badcaps for P502UI-B1 indicates BGA failures on the main processor are the suspect and not the eeprom. Usually with eeprom failures, the tv doesn’t respond to the power button.

Replace your Fluorescent Tube Bulbs and Ballasts

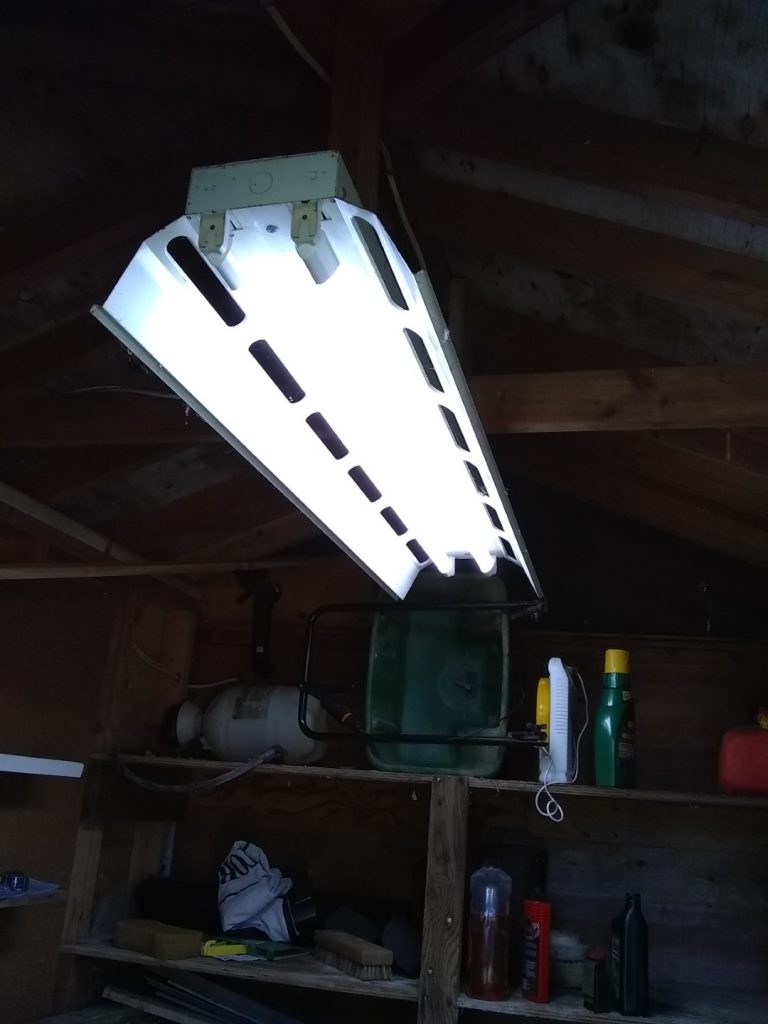
My shed fluorescent tube light has always been problematic because the bulbs don’t work well in low temperatures. With most of my home lighting replaced with LED, I found ballast-free LED bulbs at Home Depot from Toggled. They need to be ordered online but can be picked up for free at the store.

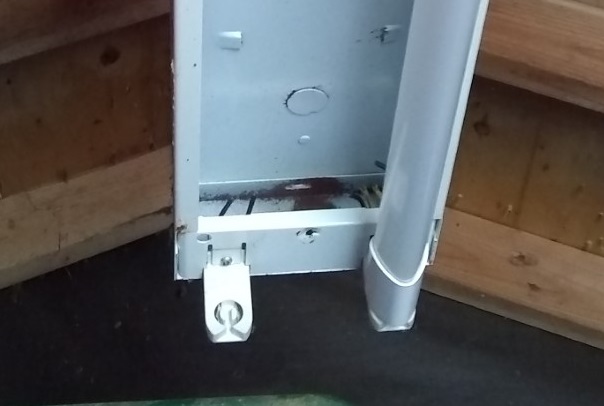
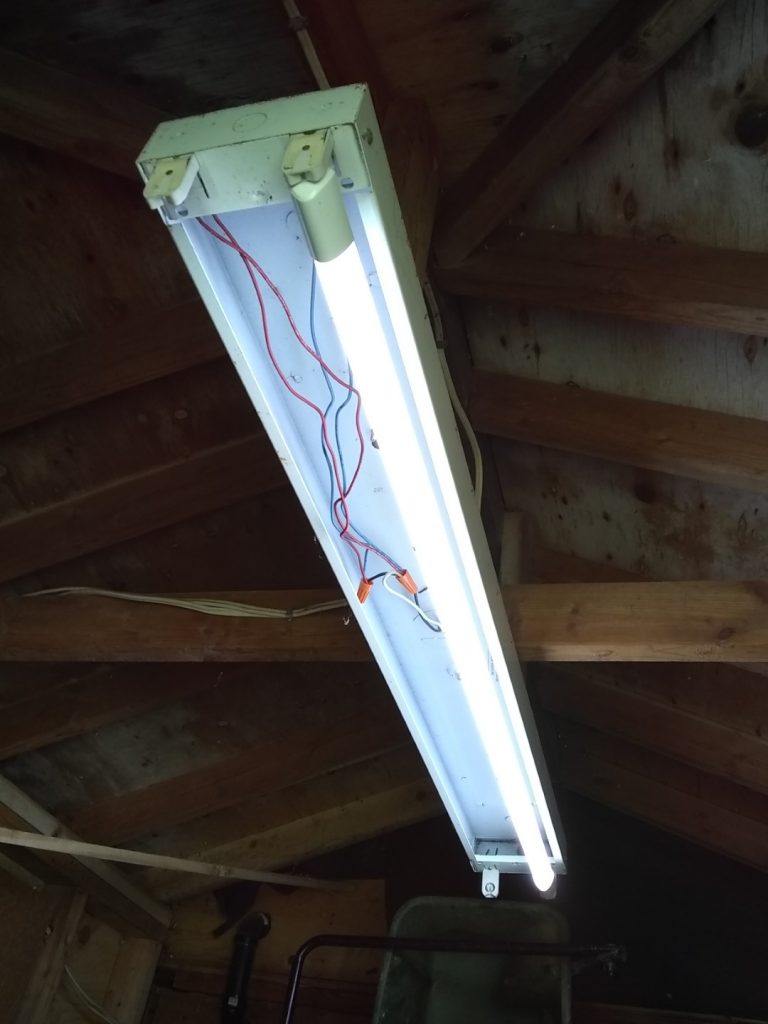
Checking the video, the bulbs are directly wired to the AC so the ballast can be removed. There is a small issue if your lamp holders are shunted (shorted together at the lamp holder end). Instant-start ballasts are likely to be shunted. If they are, they include replacement non shunted holders.

After ordering, they took about a week to arrive. Bulbs are fairly light since they are plastic. Installation was very easy. You only need to supply AC to one end of the lamp holder. The opposite side is not used so the wires can be cut at that end.

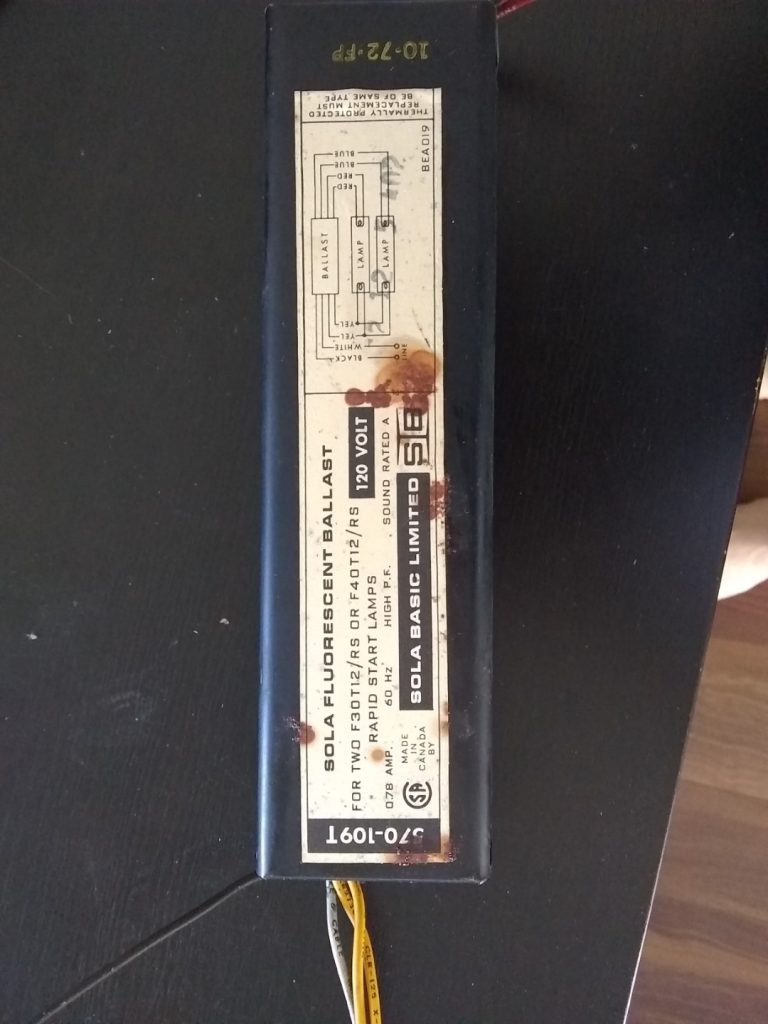
Disposing of the old ballast gets a bit tricky. Older ballasts can contain PCBs which are considered hazardous waste. To determine if your ballast contains PCB. Check this link. Mine had a 1972 date code and ballasts manufactured earlier than 1980 are likely to contain PCBs.

For disposal, I tried to follow the instruction in this link for BC residents. I had trouble registering as a hazardous waste generator and emailed productcare recycling. I was told I didn’t need to register for 2 or less ballasts and they would mail me a box to ship it for disposal. I also had another option to take it to the facility at Tilbury but would need to make an appointment.

Update: A courier in a 5 ton truck delivered an empty box and a waybill. I packaged the ballast in the heavy duty Ziploc bag provided and had to call the courier back to pick it up. They do make things way more complicated and inefficient than needed.

keywords: fluorescent ballast disposal Vancouver BC
Philips 40PFL4908/F7 Squealing Doesn’t Turn On

When plugged in, the TV squealed and wouldn’t turn on. Squealing is a sign of a shorted output on the transformer.

The service manual for this model can be found with a quick google search.

Checking the power supply board, the fuse was not blown and none of the output diodes on the AMP+13V and P-ON+21V lines were shorted. The squealing stopped when the cable from the power supply to the main board was disconnected. Measuring the resistance of the P-ON+21V line, it was 8 ohms indicating a short on the main board.

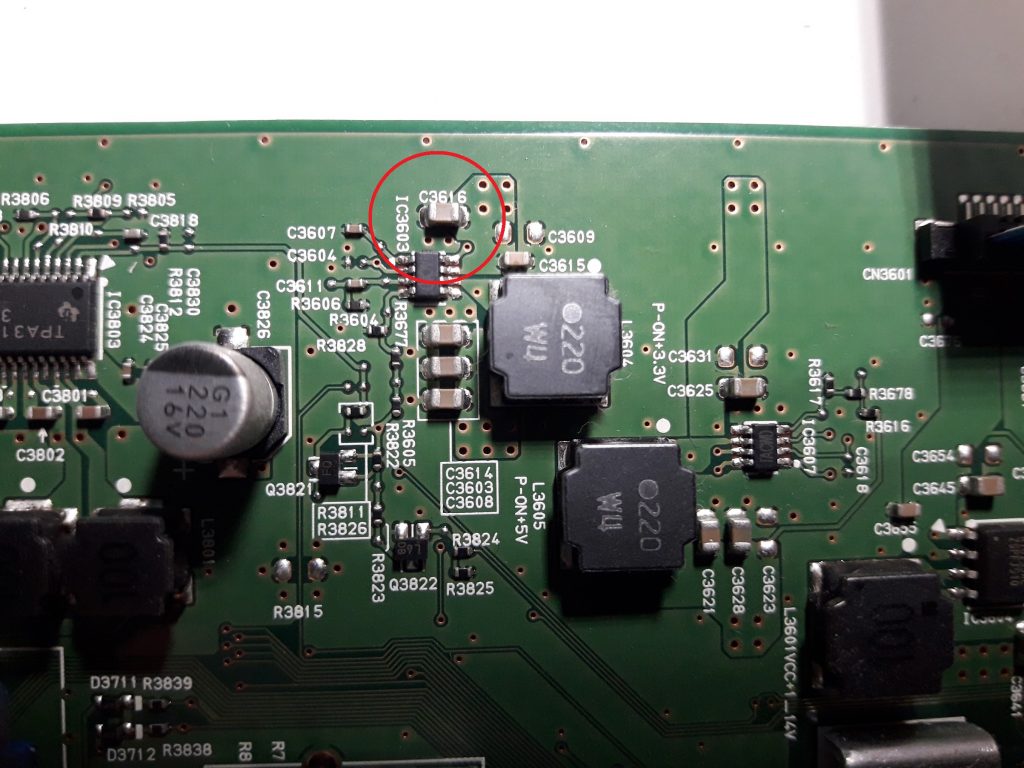
The schematic shows the P-ON+21V is input to five regulators on the main board that have decoupling capacitors for each one. The 4.7uF 0805 ones could potentially short. You will need to remove C3943, C3645, C3616, C3674 and C3625 to determine which one is shorted. It is advised to replace all of them. Digikey part would be 1276-6722-1-ND (4.7uF 35V X5R 0805)

Update – I got a second one in with no standby light but no squealing. P-ON+21V only measured just above 1V but went up to around 12V with the main board disconnected. The supplies run at half voltage in standby mode. This pulled down voltage is an indication of a short on the main board. C3616 on the 3.3V regulator, IC3603) was what I replaced before and again this was shorted. You may likely get away with just replacing just this capacitor. The other 4.7uF caps are C3625 (IC3607 5V), C3943 (IC3901 12V), C3645 (IC3604 1.14V) and C3674 (IC3602 1.5V).

LG 50LN5310 LED Backlight Replacement

The LG LN series is probably the most common model I perform LED backlight repair and replacement on. Symptom is typically the backlights flashing momentarily on power up or plug in before an error is detected causing the backlights to shut down.

In most cases, the panels use strips labelled L1 & R1 and L2 & R2 with 3 black dots and thin lenses and the LED themselves can be replaced with 3V 2835 ones.

I recently encountered a 50LN5310 with a slightly different panel and LED strips. Shopjimmy indicates there are 2 different strips that could be used on this model. On disassembly, the screws for the metal bezel holding the panel in place were different and the side tabs on the panel were taped to the plastic bezel holding the diffusers. The LED strips used the thick style lenses and measuring the LEDs themselves indicated they were the standard LG 3V 2835 type. If you try to remove a strip, you will likely pop off the lenses so it is recommended to replace the LED with the strip attached to the chassis.

On the TV I worked on, many of the lenses were loose and ready to fall off. It is recommended to keep the exact same orientation and have the lens perfectly centered on the LED when gluing it back on. I have been using 5 second fix glue recently since you can adjust the lens and check it before curing it with the UV light. The glue is fairly cheap on ebay shipped from China. If the lens is not perfectly centered, it could create bright spots on the screen. If the lens falls off, it will create another bright spot.