Category Archives: Technology

Mac OS X Reinstallation or Install on New Hard Drive or No Boot

I got a hold of broken 2007 Imac which couldn’t boot.  The progress bar would pop up and then the system would shut down.  I was told the Imac was missing a hard drive.

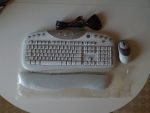
Taking apart the Imac was a little tricky since you needed a suction cup to remove the magnetically connected glass panel.  I used my smartphone windshield mount.  A Torx T8 screwdriver is needed to remove the LCD panel and Torx T6 screws holds down a LCD connector.  With the panel off, I noticed that there was a 1TB hard drive in the Imac.

The machine was a bit dusty with brown dust which is an indication the previous user was a smoker.  I vacuumed the dust up and cleaned the glass with a foaming glass cleaner.

My next step was try to boot to recovery mode by holding down the Command and R keys when you hear the startup chime.  I was able to get into the recovery screen which installs the recovery image onto a Ramdrive.

With the Disk Utility, I erased the drive.

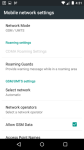
I first ran the Reinstall Mac OS X utility (for Mountain Lion).  It wanted to connect to the internet (you can set up the wifi to connect) and then asked for an Apple ID in order to do the reinstallation.  Researching indicated that Mac OS upgrades are tied to users and not machines.  There is an internet recovery mode that will download the original OS that was on a Mac but this only works on machines built in 2011 or newer.

I had the original OS CD so I put it in the drive and rebooted.  You can hold down the C key to boot off the CD when you hear the chime or hold down the  Option key which will then ask you what device you want to boot off.  After a while, it booted back into the Mountain Lion recovery mode.  It appeared that the CD was damaged.  I confirmed this by booting off the same CD with an external USB CD drive.

I next attempted to recover the CD onto a USB with the Disk Utility.  I first partitioned the USB drive as GUID format so it was bootable and then recovered the CD onto the USB.  Though it took a couple of hours, the USB didn’t boot and it went into the Mountain Lion recovery.  I tried a second time and had the same result.

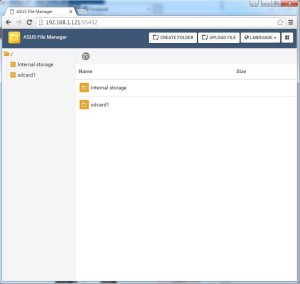
I ended up finding an OS image and was able to put it on a USB drive.  I had to rename the file and remove the spaces in order to “Scan Image for Restore” with Disk Utility (accessible through the top menu options).

Once I had a good image on USB, the computer booted from it and guided me through the installation process.  The imac then booted cleanly without any issues.

Though the Imac with a 24″ screen is nice, I didn’t need a third home computer.  If I did need a mac, I can install mac OS onto a virtual machine on Windows.

A 2007 dual core Imac can run El Capitan quite comfortably if you upgrade the memory.  This model can take up to 6GB of RAM.  1080p video played smoothly.

HP G56 Laptop – No Video, No boot, Blinking Caps Lock Key Part 2

I posted about a temporary fix to a non-booting HP G56 laptop here by wrapping it in a blanket.  After fixing a PS3 by baking the motherboard (see post here), I was confident in using this technique to repair the laptop.

First step was to disassemble the laptop.  I removed the battery, the bottom access panels, the RAM memory, the wifi adapter, the hard drive and all the screws.  I was then stuck and consulted this video on youtube.

The next step was to remove the keyboard.  I had trouble removing the keyboard and it ended up being a few screws I had missed from the bottom including one underneath an access panel.  I ended up breaking one of the key caps as well which I carefully crazy glued back on.  There are four tabs on the bottom of the keyboard so you need to pry up from the top.

Once the keyboard was out, the case could be snapped opened to access the motherboard.  I removed the fan, the socket-mounted processor (turn the screw 180 degrees to release) and the battery since these could not be put in the oven with the board.

I prepped the board with standoffs, insulated the electrolytic caps and applied some flux to the BGA video chip.  I then baked in a preheated 375 deg F oven for six minutes like the PS3 board.

Once the board cooled, I put everything back together and the laptop booted up no problem.

Update: The laptop is flaky again after a couple of months though the blanket trick will bring it back up.

Fat PS3 Yellow Light of Death YLOD Repair

I got hold of a broken PS3 that wouldn’t power on. When you hit the power button, the yellow light flashes briefly, the system beeps three times and then it shuts down. This symptom is defined as the yellow light of death (ylod). The Xbox also has a failure producing a red ring of death (rrod). Having researched a similar problem with a HP laptop, see post here, I knew the issue was probably flaky lead-free solder ball connections under BGA (ball grid array) chips.

I found a good guide on taking apart the PS3 here.  The rest of the guide attempts the repair with a heat gun.  The problem with this approach is that applying heat to one area could warp and stress the board. I then read a few guides whose repair method was to bake the board in the oven. Though this guide here had lots of detail, I didn’t like the technique of turning on the oven with the board inside. This could potentially burn the board.  If you’ve ever tried to bake cookies as a kid without pre-heating the oven, you will know the result.

I disassembled the PS3 following the first guide. You need a security Torx T10 screwdriver to remove the cover but my regular Torx T10 worked. You may be able to remove a security torx with a small flat screwdriver if you don’t have the right screwdriver.  The guide was pretty helpful though I took the power supply off earlier in the process since it was restricting access to a ground wire.

It appeared my PS3 had been taken apart and repasted before since the thermal paste was not dried up and a few screws were missing. Repasting will not fix this problem but should be done if your PS3 still works but is running hot as a preventative measure.

Following some tips, I prepped the board by insulating the electrolytic caps with Instant TAC (dollar store) but I didn’t use small pieces of tinfoil on them since I figured it would just draw heat to the area.

Once you have the thermal paste off, the two big chips actually have heat spreaders on top of the actual ICs.  These can be removed to replace the small bit of paste underneath but I didn’t bother.

I also didn’t prebake the board at low temperature in the oven and only used a bit of flux I had leftover in a pen.  It was difficult to get flux underneath the chip but it’s probably not too crucial of a step.

I used bolts I had lying around to make standoffs to raise the board up. I was short nuts but these can be bulk purchased at Home Depot for 20 cents each.

For thermal paste, I used ceramic based compound instead of the recommended AS5. AS5 is conductive and spillover might cause a short.  Since my board had been repasted, it wasn’t too difficult to remove the existing thermal paste.

Following this guide, I preheated the oven to 375 deg F. Melting point for lead-free solder should be around 360 deg F.

I put the board on a cookie sheet lined with aluminum foil and baked for 6 minutes. I then shut off the oven and opened the door.  I didn’t bother using fans to cool the oven.

After the board had cooled, I reinstalling the board and the PS3 powered up. With this success, I wanted to bake my friend’s G56 HP laptop which will be covered in a future post.

I updated the firmware to the latest but shouldn’t have done that step.  Firmware versions 3.55 or earlier can be jailbroken.

Since the PS3 didn’t come with any controllers, I had a difficult time finding used ones since they are heavily in demand.  I did find a solution by using wired PS2 controllers than can be plugged into a PS3 with a USB adapter that can be found on ebay.  I ordered one a bit too soon since there are dual versions that accept two controllers on one USB plug.  PS3 controllers are also heavily counterfeited and new ones on ebay might not be genuine.

Edit: The problem with using PS2 controllers with the PS3 is that the PS2 controllers do not have a PS button.  This button is used to connect to the console, check battery level, exit from a game to the main menu and holding it down will give an option to shut off the console.  Also some games don’t seem to work like Gran Turismo 5.

Edit: After a couple of months of little used, the YLOD has come back.  Not really worth rebaking since I got hold of a slim with a bad DVD drive but the DVD drive and hard drive could be salvaged from the fat PS3.

Unlocking Moto E (2nd Gen) XT1526 (Boost Mobile, Sprint) for GSM (Rogers, Speakout) in Canada

My budget Huawei Y530 smartphone was starting to have trouble updating apps with insufficient storage errors.  With only 512MB of RAM and 4 GB of storage, the built-in google apps get bigger with every update consuming what little space was available.  See my review of the Huawei here.

My next budget phone was going to the Moto E (2nd gen).   With Android Lollipop (5.x), 1GB of RAM and 8GB of storage, there should be much improvement over the Y530.  I had seen it go on sale for $50 CAD during Boxing Day last year.  Searching redflagdeals, it was on sale for the same price at Walmart several months ago and at Loblaws recently.  The models sold for Canadian networks were North American versions that are easily unlocked with a code purchased online.

I searched Best Buy in the US and found the Moto E on sale for $30 USD (Boost Mobile-Sprint network).  It had been on sale for as little as $10 on Black Friday.  The wikipedia page indicates several LTE models with two of them specific for US carriers (XT1526 Sprint & XT1528 Verizon) This posting on redflagdeals indicated they should work in Canada.  The guide below should also apply for the XT1528 though this version appears to be heavily locked down against rooting or other modifications.

Up for a challenge, I picked this up at the Bellingham Best Buy.  When I got home and powered it up, it wanted to activate (but failed because it couldn’t see the network).  It eventually timed out.  I then connected to wifi and took all the system updates which brought the Android version to 5.1.

My SIM for Speakout was a standard size and the Moto E takes a micro SIM.  I didn’t want to risk destroying my SIM by cutting it down and got a new SIM at 7-11 (normally $10 but current promo is free with $100 top up plus $25 credit).  You can find punches on ebay for several bucks and smaller cell shops will cut them down for a small fee as well.

From the redflagdeals post, the XT1526 is not locked internationally but that model’s version of Android doesn’t let you change the network type from Sprint CDMA to GSM used by Speakout and most carriers worldwide.  The Boost Moto E also has a SIM pre-installed in the phone.  I should have pulled it out before initially powering on to avoid the activation process.

To change the band, you can either type *#*#4636#*#* into the dialer to get into the radio settings or download the “Network” app (black phone icon in white circle) which provides a shortcut to the same menu screen.  Scroll down to the buttons and you will find a drop down to “Set preferred network type” and change it to “LTE/GSM auto prl”.  Go back to exit and check the settings under Settings->Mobile Networks.  Network mode should now indicate GSM/UMTS.  Insert your SIM and under “Network operators” in the same menu, you should be able to search and select Speakout or Rogers from the list provided.  For data, check if it is working and make sure “Allow GSM Data” is checked.  If isn’t working, you can try to set the APN manually.  I downloaded the “Change APN” app  which is a shortcut to the APN menu and added the entries following this guide.  It didn’t seem to take it but my data was working so not sure if it was automatically configured when I selected the network.

You should also turn off any Roaming Guard features since you are using this phone outside of the US and will get warnings every time you send a text.  You can find this setting in  Settings->More->Mobile Networks->Roaming Guards. Uncheck Call Guard, Data Guard and Outgoing SMS under GSM Roaming.

With the Moto E (2nd Gen), there are a few negatives.

  • No LED flash.  If you need a flashlight, there are a few screen flashlight apps.  I downloaded “Screen Flashlight”
  • There is an LED indicator but it only lights up if the battery is low and can’t be used by apps or for message waiting notification.  The phone uses a feature called “Moto Display” which will show you both the time  and icons for unread messages on the screen if the phone is moved when sleeping.  Though this is a nice feature, I still prefer a flashing LED.
  • There is no data switch toggle on the quick settings panel on the top right.  This functionality appears to be a change in Android Lollipop and not a restriction in the phone.  Since I am on a limited data plan, I can’t have my phone downloading updates when I am on data.  Luckily, I downloaded the “Data Usage” app which provides a shortcut to the data usage screen where the data can be toggled on and off.
  • No update to Android 6.x Marshmallow for US models.  Non-US versions have gotten the update.  One feature in 6.x is the ability to marry the external SD card to main storage so you don’t need to move apps to SD card to free up space (they may get moved back during an update).  But the 8GB of storage should be adequate for most users
  • Locked for US carriers.  Not sure if this can be unlocked with a code since I won’t be using in the US.

Other than these issues, I find the Moto E quite responsive and a great deal for $30 USD.

Update – Don’t throw out your Sprint SIM card because it can be used with Ringplus (“free” phone service in the US).

Update – Check this post here on how to minimize your data usage.

Costco Seville Classics Tower Fan Remote Control Repair

My remote for my tower fan recently stopped working.  With my previous remote repair experience (see post here), I figured I could fix it.

This remote was a bit smarter with an LCD display and didn’t have a ceramic resonator.  Viewing the IR LED through my smartphone’s camera indicated there were no pulses coming from it.  With the remote disassembled and batteries removed, I tested the LED in-circuit with a multimeter in diode test mode.   Checking both polarities, neither direction indicated a voltage drop so the LED was probably faulty.

I scrounged the recycling depot for some old remotes and removed the IR LED from one and installed it temporarily in my broken one.  I needed a 3mm LED and the replacement  was a larger 5mm but it would confirm if the LED was indeed faulty.  Replacing the LED worked so I ordered some 3mm IR LED’s on Ebay from China for around $1.  These came in pretty quick and now the remote is as good as new.

BTW, this is an excellent fan.  The tower design takes up much less space than a regular fan, has multiple modes and a timer which is great for bedtime.

Betternet Free VPN Review

With Cloudnymous shutting down, I was searching for a new VPN provider.  I looked at Vpnbook, Ivacy, Expressvpn, and Private Internet Access.  I eventually found Betternet which is a FREE VPN service.  Most services charge around $4 USD or more per month.

I have been using it for a couple of months and it seems to be ok.  For PC’s they provide an app which can be a big buggy.  It crashes often starting up and sometimes is slow to disconnect.  Service wise, speeds are good and downloading is permitted.  Traffic may shut down completely but it does maintain the connection which is good thing.  If this happens, I need to disconnect and try re-connecting.

There is always skeptism of free services since they may be collecting data or start charging later on.  For now, Betternet seems to be a good option to protect your privacy and the price is right.

Insufficient Storage on Android Phone

My budget Huawei Android phone is getting a bit full with apps and has trouble with some updates.  I first encountered problems trying to update Google Chrome but was able to get it to work by first uninstalling all updates before reinstalling.  I installed a 16GB SD card and set it to default storage but most apps can’t be moved to it.

I bought a combo case/wallet for my phone on ebay and usually minimize what I carry to only my drivers license, credit card and maybe some cash.

On a recent trip to Lowe’s, I didn’t realize they accept air miles and didn’t have the card with me.  I found the app Stocard to save loyalty cards to your phone but couldn’t install the app because of insufficient storage error again.

Googling the problem lead to the solution of clearing your app cache.  You can install App Cache Cleaner by Apex Apps or you can find a manual solution online.

Update:  The App Cleaner isn’t working too well and I will probably need to buy a new phone eventually.  Google’s built in apps get bigger with each update and you are not able to uninstall them leaving less room for apps.  You can disable them however.  Some of the Android versions no longer allow you to move an app to SD card.


Wireless File Transfer with Asus File Manager

When transferring pics from my tablet to my PC, I normally just attach it to an email and retrieve it from the drafts folder on my PC.  I had a bunch of photos this time and decided to use USB but when I plugged in my tablet, I got a notification to use wireless transfer.

You need Asus File Manager which is available for everyone at the Google Play Store.  There is no built in file manager app in Android.  To start it, run File Manager on your tablet and scroll until you find PC File Transfer on the bottom.  Start the service and it gives you a web address to access your tablet’s file system from a browser. Internet Explorer was not supported so I had to use Chrome.

The files are in a weird  order and you can’t click on the Name or Date heading to re-sort it like in an Explorer window.

This does seem to be an easy way to transfer files though tricky to find your files without sort capability.

Update July 25 2016:  Internet Explorer seems supported now but clicking on a jpg will open the image in a new tab.  If you use Chrome, the image will be saved in your Downloads folder which seems easier if downloading a large number of files.


filemanager

HTPC Keyboard and Mouse Options – Logitech K400 Plus Review

When I built my HTPC many years ago, there weren’t a lot of budget keyboard options so I just picked up the Logitech Cordless Navigator Duo.  This served me well for many years since I used rechargeable Eneloop batteries and the keyboard was barely used.  The mouse worked well on the carpet or couch.  What was annoying was that moving the mouse would wake up my sleeping PC (though I could’ve disable this in Windows).

For small amounts of typing, I generally use Window’s built in On Screen Keyboard under the Accessibility tools with my mouse.  I’ve stickied this program to the taskbar.  I’ve also experimented with the Unified Remote app which lets you use your tablet or smartphone as a keyboard/trackpad combo.  It was simpler just going back to the mouse.

With the recent Boxing Day sale, I decided to upgrade my keyboard for the Logitech K400 plus for $25 on sale.  This compact keyboard features an integrated trackpad.  Other features include a USB unifying receiver dongle (instead of a big bulky receiver) with a storage location inside the keyboard’s battery compartment (clip in the cover itself) and an on/off switch.  Cons include bunched up arrow keys and the PC sleep button requires holding down the FN key.  Range was not an issue even with the dongle plugged into the back of the PC.

Since I have become too familiar with using the mouse and with the unifying receiver dongle supporting multiple devices, I picked up a compatible Logitech M317 mouse on ebay for about $3 USD.  The newer cordless mouse technology only needs 1 AA battery and has an on/off switch on the bottom.  Pairing the mouse with the receiver was as simple as downloading a small app from Logitech and turning the mouse off and on.  There are no problems having both the trackpad on the K400 keyboard and mouse both enabled.


Forcing Windows 10 Update on a New Laptop

My friend finally bought a new laptop but it had Windows 8 on it.  When first powered up, it had 160 important updates for Windows 8 but no option to directly update to Windows 10 though it asked during the initial setup.   I assumed I would get the update notification icon after installing all the updates.  It took hours to install these updates and still there was no Windows 10 update icon.   After some searching the correct procedure is detailed below.

To force an update of your new laptop, go to Microsoft’s update page here  You can download the Media Creation Tool.  This tool will update your current OS or allow you to make a bootable USB drive so you can perform a clean install.

To find your system type, either 32 or 64 bit version,  type System in the search tool.  This can also be found under Control Panel->System & Security->System.  Third option is right-clicking on Computer under the Start menu or desktop icon and selecting Properties.

I did use this tool to create a bootable USB before but forgot it could be used to force an update.