Category Archives: Technology

Upgrade your Desktop with a SSD Drive and Windows 10 Freezing

With SSD drives dropping in price and capacities increasing, I decided to update from Windows 7 to 10 and to a SSD drive at the same time. This would allow a fresh install of the OS.  Windows 7  is nearing both end of life and end of support. By doing the install on a new SSD drive, I will still have my data and files preserved as a backup.

I picked up a Samsung EVO 860 1TB at Best Buy for $180 CAD. Amazon.ca was the same price and the Western Digital Blue 3D 1TB was a little cheaper at Amazon but was a prime exclusive.

The latest Windows 10 can be download directly from Microsoft and the installation tool can transfer it to a bootable USB drive.  Reports indicate that if you have  a valid Windows 7 or Windows 8 installation, you can still get a free upgrade.

After a fairly painless install, there was a significant improvement in the Windows boot time and I can now boot in about 15 seconds.

I downloaded PowerISO since I had to extract an  archive and it ended up installing Chromium adware.  It installed in the start up and thus was a bit tricky to remove.  I do recommend installing Malwarebytes Antimalware and paying for a yearly license.

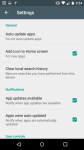
During installation, I minimized the options that are a bit intrusive such as logging in and tracking your location.  There are other annoying features that are enabled by default such as building albums in the background with the photo app and displaying of ads on the lock screen.  These can be easily turned off with a quick google search.

I did run into a more serious problem of occasional freezing.  Googling this issue, one suggestion was to set the hard drive sleep time to Never (0 minutes) in the Advanced Power settings.  I did this but freezing still occurred.  Next suggestion was to update the SATA drivers.  I went into Device Manager but noticed my drivers were all ATA and not SATA.  Checking my motherboard’s BIOS setup, it  was configured  for Native IDE.  In 2010 when my motherboard (Gigabyte GA-880GM-UD2H) was manufactured, AHCI was a new standard not supported by Windows versions at that time.  With Windows 10, SATA drives should be set to run AHCI which is the default standard.  RAID is another option that uses a dual drive configuration for improved reliability typically used in server setups.

Fearing I needed to reinstall Windows 10 again to switch to AHCI, I found this webpage for a procedure to switch to AHCI from IDE without the need to reinstall Windows.  This procedure worked for me.  To get the command prompt in the latest Windows 10, right-click the Start menu and choose Windows Powershell (Admin).  I had to use the command lines WITHOUT the {current} instruction.


Samsung TV Can’t Play Video Files

My parent’s Samsung smart TV’s built in media player had been pretty impressive.  It played avi and mkv files without any issue but lately I saw a format which it could not play.  Videos are now being encoded in H.265 HEVC (High Efficiency Video Codec).  It is much more efficient than the most common standard H.264   With this newer standard, both TVs and media players won’t have the hardware to support it.  Support of H.265 is something you need to look for when buying a new TV, android box or media player.

To get H.265 video to play in older hardware, you can transcode it using a open-source program like Handbrake.  Transcoding to H.264 will make it more compatible sacrificing a larger file size.

Update: H.265 is the standard used with 4K video so any 4K smart TV or 4k compatible media player should natively play H.265 encoded video files.

Officejet 6500 E709n Won’t Print – Clogged Printhead

My dad’s Officejet wouldn’t print so I tried the cleaning cycle with no success. With inkjet printers, ink will eventually dry up and clog the printhead.   I previously had an Epson 600 inkjet printer which I had to take apart to clean the printhead.

With the Officejet, the printhead is removable for cleaning.  HP has instructions on it’s website and a video on youtube showing a cleaning procedure which involves soaking it for 15 min in hot distilled water.  I tried both a 15 min soak in isopropyl alcohol and running it under a hot tap and it was still clogged.   What did work for me was a 24 hr soak in alcohol.

  1. Remove your ink cartridges, wrap them in a moist paper towel and place in a ziploc bag.
  2. Lift up the grey lever to remove the printhead.
  3. Soak the printhead for 24hrs in a small plastic tub filled with isopropyl alcohol.  I used enough to cover the input nozzles.
  4. After the soak, rinse it with distilled water and let dry.
  5. Reinstall the printhead and cartridges.

If the above doesn’t work, you can try repeating the soak.  As a last resort, replacement printheads are available on ebay.

Wecast Wireless Display Dongle from Ebay Review

I purchased this Chromecast knockoff dongle on ebay for $13 USD.  This device lets you mirror your smartphone or tablet screen to your TV through the HDMI port.  Though there are English instructions, they are difficult to follow.

The dongle sets itself up as a wireless access point initially so you can connect to it and give it the wireless settings for your home network.

Here are the steps –

To Setup:
1. Plug in the dongle into your hdmi port.  The dongle needs power from a USB port either from your TV or external adapter.  The screen should show the Device ID, Password and IP address. If this screen shows up again, it means the dongle has lost connection to your home network and you will need to reconnect following step 2 & 3.
2. On your tablet, go to your wifi options and search for the Wecast network shown in the Device ID. Connect using the default password 12345678
3. Open a browser and enter the IP address from the home screen. You now need to give the dongle the network settings of your home network under the Wireless AP option.  Once the dongle connects, the home screen will show just the device ID and no password or IP address.  This screen indicates the dongle is connected to your wifi.
4. On your tablet, go to your wifi settings and reconnect to your home network. Using the quick menu, select Play To and find the wecast device. If there is no Play To button, you will need to add it. If it doesn’t connect, try again. If the home menu displays the password, it has lost connection to your network and you will need to repeat from step 2.  If you tried a few times and it still doesn’t work, unplug and then plug the usb on the dongle to reset it.

With my Asus Z300M tablet, I can play 1080P video smoothly with video files from storage using the default video player.  VLC seems to have problems with this setup.

I can’t play any streaming video online like youtube.  I believe it is too much work for my tablet and wifi to simultaneously stream video and output it to the dongle.

The dongle does try to update the firmware on it’s own but fails.  The wifi signal may be weaker than it needs.  I am hoping it will update and maybe connect more reliably.

You should be able to mirror with a direct wifi connection but I had more trouble connecting with a direct connection.

Replacement USB Phone and Tablet Charger on Ebay

I have a problem where I needed dual USB jacks for charging up to two tablets.  The area I need power doesn’t have an electrical outlet so I have run a two prong extension cord.  You can buy electrical outlets these days with built in USB ports but this wasn’t an option in my situation.

There are a lot of dual port chargers on ebay but you do have to worry since most cheap chargers do not have UL safety certification.  You need to pay more for a name brand product.  You don’t want to start a fire to save a few bucks.  Chargers are not created equal though they may look the same on the outside.

To charge the larger batteries of tablets, you need one that outputs 2-2.4A which is more that a standard PC USB port.  Checking specifications, sometimes it’s not clear if on dual port chargers, both ports output that much current.

I was able to find the Blitzwolf BW-S3 at Banggood shipped from China decently priced.  Their website indicates their products are safety certified though there is a chance of getting a counterfeit item.  The charger arrived fairly quickly and is working well.

Use A Magnetic Micro USB Adapter to Prevent Wear and Damage – Wsken Mini 2 Review

I had the micro usb jack on my android Asus ME301T tablet wear out and I replaced the connector unsuccessfully with the part ordered on ebay.  While removing the motherboard, I broke the locking tab on one ribbon connector (yanked it instead of lifting up) and the new connector was flaky since I couldn’t get enough heat to solder down the ground tabs with my old soldering iron.

I eventually ended up finding a new motherboard on ebay and replaced it.  Ever since, I have been worried about the micro usb breaking again.  There is a lot of wear on the connector since it needs to plugged in at least twice a day or more.  I have been using an extension cable and leaving the micro usb cable plugged in but was worried there could be more damage if it is dropped due to the weight of the tablet and stress on the small connector.

My fears became real when I dropped the tablet with the connector plugged in and the connection became flakey.  Searching ebay for cables, I stumbled on magnetic adapters.  They appear to be knockoffs of a kickstarter project, Znaps but there are other suppliers including Wsken and Volador which have good reviews.   On Amazon.ca, I found a Onebook (probably a knockoff) cable with two plugs for $10 CAD shipped.

I decide to order a new tablet and was able to find the Asus Z300M on Amazon.com for $130 during Amazon Prime Days.  I ordered a silicon case and a Wsken Mini2 magnetic cable to go along with it since the Onebook cable may take months to arrive.  The cable included a plastic tool to pry out the adapter and a small velcro cable strap.

So far the Wsken cable seems pretty good.  The plug is uni-directional and will catch about a centimeter away.  No more fussing trying to align the plug and determine if it is the right direction.  If the plug is reversed, the magnets will cause the plug to repel.  There is also a small LED on the plug to indicate it is getting power.  Retention is very good.  This adapter should prevent wear on the plug and break away if the tablet is dropped when plugged in.

Update – After 5 months, the plug for the Wsken Mini 2 broke.  I had the Onebook cable sitting around so switched to it.

The Onebook cable is  a bit thinner and has a dual colour LED that changes from green to blue when charging.  It is also completely reversible.

Update 2 – The onebook plug broke as well.  Luckily I have a spare but it doesn’t seem like  this model is carried by the Amazon seller anymore.   I have a 3-pack of Netdot cables in my Amazon cart as a backup if this one breaks.  Though it may seem fun playing with the plug magnetically snapping it to the cable, I am now gently letting them connect to get more longevity from the plug.

Update 3 (Apr 2021) – I had ordered a 3-pack on Gen2 Netdot cables on Amazon in 2018 and all three plugs have broken.  The first one lasted a few years and the last one broke when my tablet fell charging and the magnet didn’t disconnect.  I contacted Netdot and they are in Gen10 for their cables and didn’t have plugs for Gen 2 anymore.  I found inexpensive Keysion cables on Aliexpress and ordered 2 cables ($1.99 each) and 6 plugs ($0.69) which should be good for a few years hopefully.

Motorola DCX3400M DVR Loses Guide Data After Firmware Update

My DVR got a firmware update about a month ago which changed the default background colour to black and the menus went from standard width to widescreen.  However, it became unstable and would periodically freeze and lose all the guide data.  This could happen within hours or days.  I unplugged it a few times and patiently waited for another update but finally contacted the cable company.

They indicated they hadn’t had reports of issues but could send a reset signal.  However, this signal would wipe out all my scheduled recordings.  I told them I would find a solution on my own.  With my previous generation Motorola DCT64xxx, you could force download of new firmware by holding down the power and menu buttons while plugging it in.  There is a guide here

With the DCX3400, the buttons are soft but I was able to find the alternate procedure in a forum.  When you plug in the AC, the front display will display 88:88 briefly and at this point you will need to press and hold the MENU button until it says “boot”.  From this menu, I was able to perform a cold boot by pressing UP until it says “cold” and then SELECT.  After it rebooted, it displayed channel 0 and I had to contact the cable company to request a “hit” in order to get the dvr back running.  So far, it hasn’t frozen after one day.

If you want to download the firmware again, at the boot menu, press the DOWN button until it says “oob” and then SELECT.  It will take awhile and once it is done, it should show a channel 0 like above.  I would only try this step if the cold boot didn’t work.

This procedure should work for DXC3xxx models like the DCX3501 and DCX3510.

Edit: After a day, it lost guide data again.   I am going to try to reload the firmware next.

Update: I was finally able to get the DVR in a more stable state by clearing all the data on the hard drive.  This procedure will clear all recorded shows and scheduled recordings.

With the DVR on, turn it off and immediately press the OK button on the remote.  The diagnostics screen should be displayed. Press the circular counter-clockwise arrow (REPLAY on some remotes) 2 times, press the MyDVR (LIST on some remotes) button 3 times and press the live button once.  CLR should be on the front display and hit OK button to clear the DVR.

Slim PS3 DVD Drive Not Working

While searching for controllers for my fat PS3, I ended up getting a deal on a slim PS3 with controllers but with a broken DVD.  Research indicated the lasers do burn out over time and Sony actually has a dual lens design (separate lens for CD/DVD and Bluray) to extend the life of the Bluray laser.  Testing the console, CD’s and DVD’s played fine while game discs could not be read.  I opened up the DVD and cleaned the lenses with rubbing alcohol but saw no improvement.

Replacement options include replacing the whole drive, the track assembly or just the lens head.  This  web page indicate the different models and drive types so you need to make sure you get the correct part for your model number.  You can confirm by opening up the DVD drive.

If you replace the entire drive, you need to swap the drive’s main board since the console is married to it.  Entire drives were around $45 USD on ebay.

The track assembly is an easier swap than the just laser head and is only a couple bucks more.  I found a brand new one on ebay for around $20 USD shipped.  The seller’s listing indicates over 1,400 sold.

There are quite a few guides online and on youtube on how to do the replacement.  There are three security Torx T8 screws holding the case together.  This is the same security screw type used in the fat PS3.

Edit:  The part arrived, I installed it and game and blu-ray discs are reading.  Make sure you get a new laser and not a used one.

Update: The next day, the game discs were not reading again.  I went back and reseated all the connection with no improvement.

Update 2: The seller gave me a RMA to exchange the part and the replacement is working fine.

Reducing Background Cellular Data Usage on an Android Lollipop Phone

I am on a 100MB/month plan which I primarily use to check email but I had been getting large downloads happening in the background.  Steps I did to limit the amount of data include the following:

  1. Use the My Data Manager app.  Though there is built-in data usage tracking within Lollipop, the app provides notifications and more detailed statistics.
  2. Configure Play Store to not auto-update apps.  This option is set within the Play Store app.   Menu bar icon -> Settings -> Auto-update apps.  You can set it to update over wifi only as well but I turned it completely off.
  3. Disable sync settings for Google Accounts.  This is under Settings (main) -> Accounts -> Google -> Your account name.  I turned off sync for everything except Gmail.  Android tends to install new google features which you will need to disable the sync for.
  4. Optional.  Restrict Background Data.  I’m still unsure if gmail will be checked in the background if this is turned off.  I have left it enabled but to disable it, go into Settings (main) -> Data Usage and it is hidden under the extended menu with the 3 dots in the top right corner.  You will have a warning in your main notifications  with it disabled.
  5. IMPORTANT.  Turn off Google Play background data.  This option was probably causing my large downloads.  Go into Settings (main) -> Data Usage and find Google Play Store under App Usage.  It needs to download some data first in order to be displayed in this list.  Click on Google Play Store and you will have the option to Restrict app background data.  Repeat this step for any other app that is downloading large amounts of data in the background.

Install Android Lollipop on Asus ME301T Tablet

My old Asus ME301T had been acting up lately.  Its been running slow and all the cleaning and boosting apps didn’t really work so I contemplated reinstalling the OS.  I had updated the stock Jellybean to Kitkat 4.4.2.  See post here

I found a homemade Lollipop 5.1.1 ROM described here and that can be downloaded here.  Steps for this upgrade are as follows (assuming you have TWRP installed).  If you have game data you want to save, you can back it up and restore it with the Helium app.

  1.  Boot into recovery mode.  An option may be presented if you hold down the power button to power down.  Second option is to power off and then hold the vol down key and hit the power key.  You should get recovery options.  Select RCK with the vol up button (vol down will cycle through the choices.)
  2. With TWRP recovery, I backed up my system and data (everything except cache) onto external SD card.
  3. Move the download 5.1.1 zipped ROM image to the SD card.  Download GAPPS for 5.1.1  You will need GAPPS to install Google Play Store so you can download Chrome and Gmail.  I found a link here and downloaded the pico version for a minimal installation which only includes the Play Store.   This should also minimize the google bloat with apps you don’t use and can’t uninstall without rooting your device.  The pico version also does not include any sounds or wallpapers and you will need to download those separately.
  4. Format the internal memory with TWRP.  You can remove the external SD card to be extra safe.
  5. Install the ROM Image and then GAPPS.  Wipe the Dalvik and cache when asked.
  6. Reboot and you should be running 5.1.1

Update: I actually reverted back to Kitkat since I couldn’t save my progress in a few King games I had.  I had tried the Helium Backup app but it couldn’t connect to my tablet via USB.  I just replaced the micro-USB connector since it was worn and decided to give Helium a second try since it may have been a bad USB connection.  This time it worked so I restored the Lollipop install that I saved.

I have been running Lollipop for a few days and it’s like having a new tablet.  No more slowdowns and sluggish performance.

Update 2:  USB OTG doesn’t seem to work with this version.  It was fine with Kitkat and I could plug in USB drives, keyboard or mice before.